Replacing Logitech Control Center with BetterTouchTool
Long time, no post! Hi diehard readers. I hope this is a little reward for not cleaning up your RSS feeds.
I really enjoy using Logitech mice, which is good because almost no one else makes multi-function mice for macOS anymore. The MX Master 3 for macOS is a well designed, comfortable mouse with a lot of buttons and scroll wheels. Unfortunately the Logitech control center software is extremely bad. Over the past year I’ve been noticing mouse lag so extreme that I decided to give up on Logitech. But then I remembered I owned (and previously used) the amazing BetterTouchTool (BTT). This little darling of an app provides a huge number of options for managing input devices like keyboards, touchpads, and mice. With a little experimentation I’ve discovered that BetterTouchTool far surpasses the Logitech software with Bluetooth mice. Luckily the MX Master 3 is also a Bluetooth mouse.
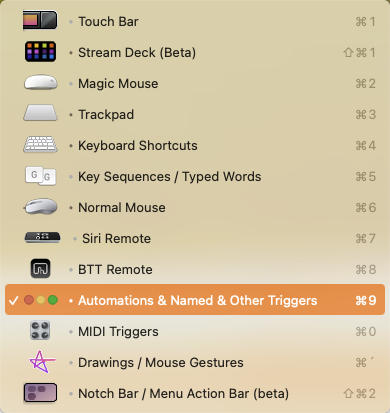
Normal Mouse
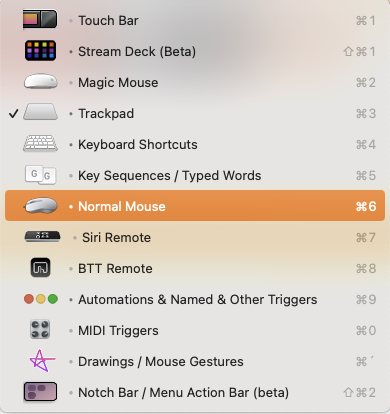
BTT supports a huge variety of hardware triggers but for this post we need only concern ourselves with the “Normal” Mouse triggers. The “Magic” Mouse is it’s own special kind of device that I don’t use.1
Side Note
The BTT documentation is available online but it’s a bit sparse. I almost gave up on using BTT because I didn’t think it has the features I needed. After an hour of experimenting with the app, it was obvious I was missing a lot by just reading the documentation. I’m not sure what this says about the RTFM methodology.
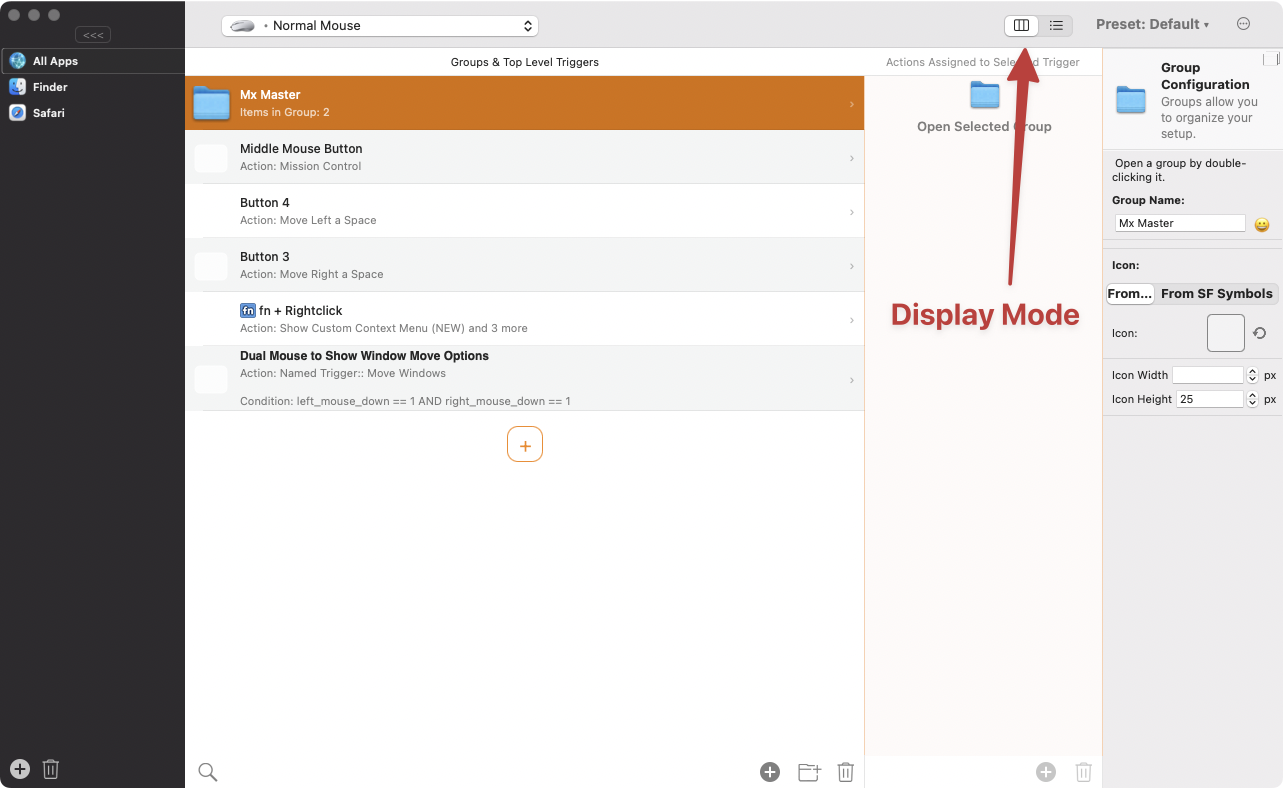
The second side note is about interface toggle for creating triggers and actions. I think the column view is much more intuitive to use. Change the setting in the main window bar as needed.
Back to the setup
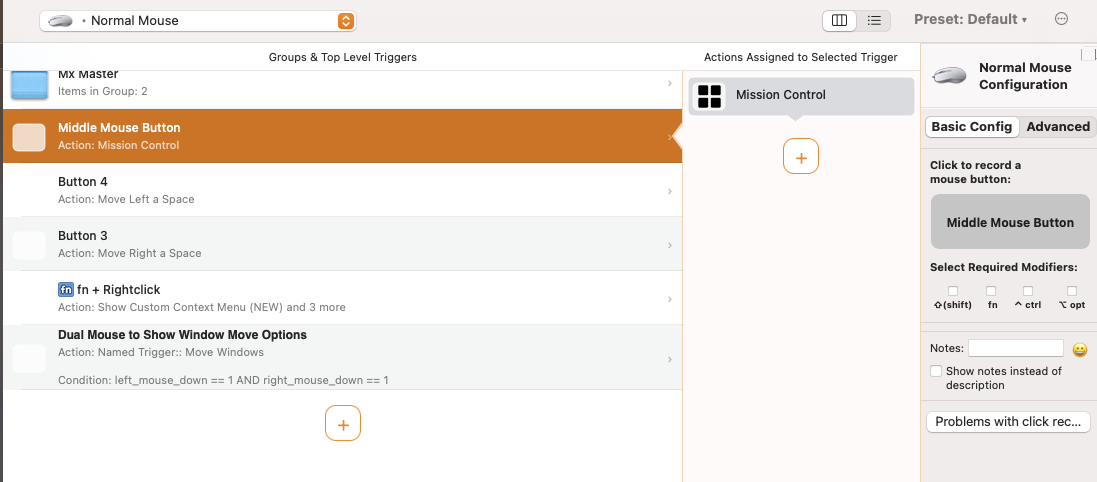
From the BTT configuration, choose the Normal Mouse and create a new trigger. For this example I’m setting up a new “middle mouse button” trigger using the basic configuration option.
To setup most mouse button triggers you just hover the cursor over the recording panel and then click the button you want to use. Next we add an action to perform. You can chain actions together if you want to make your Mac seem like it’s haunted by neurotic ghosts. I usually just have a single action I can predict. In this case I’m going to make it display Mission Control.
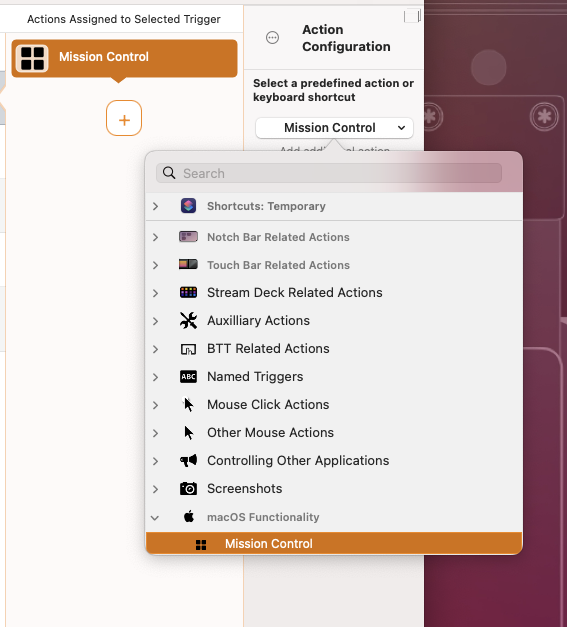
There are a huge number of actions BTT can perform. They are organized into categories that mostly make sense, but I end up using the search a lot.
We’re done. Congratulations! If you plated along, you now have one new mouse feature. But this mouse goes to eleven…
Window Control
I’ve already written about my love of window management so of course I had to take BetterTouchTool too far. Let’s go one louder and make our mouse do something really wonderful and show a menu to choose new window positions when we press both the left and right mouse buttons together.
Named Triggers
This could be a pretty useful action that I will want to trigger with my keyboard and touchpad in addition to the Logitech mouse. If I set this up just for my mouse then I will need to rebuild the action for every input device. But, BTT has “Named Triggers” that you can setup and reuse. Create it once and then bind the named trigger to a lot of other triggers.
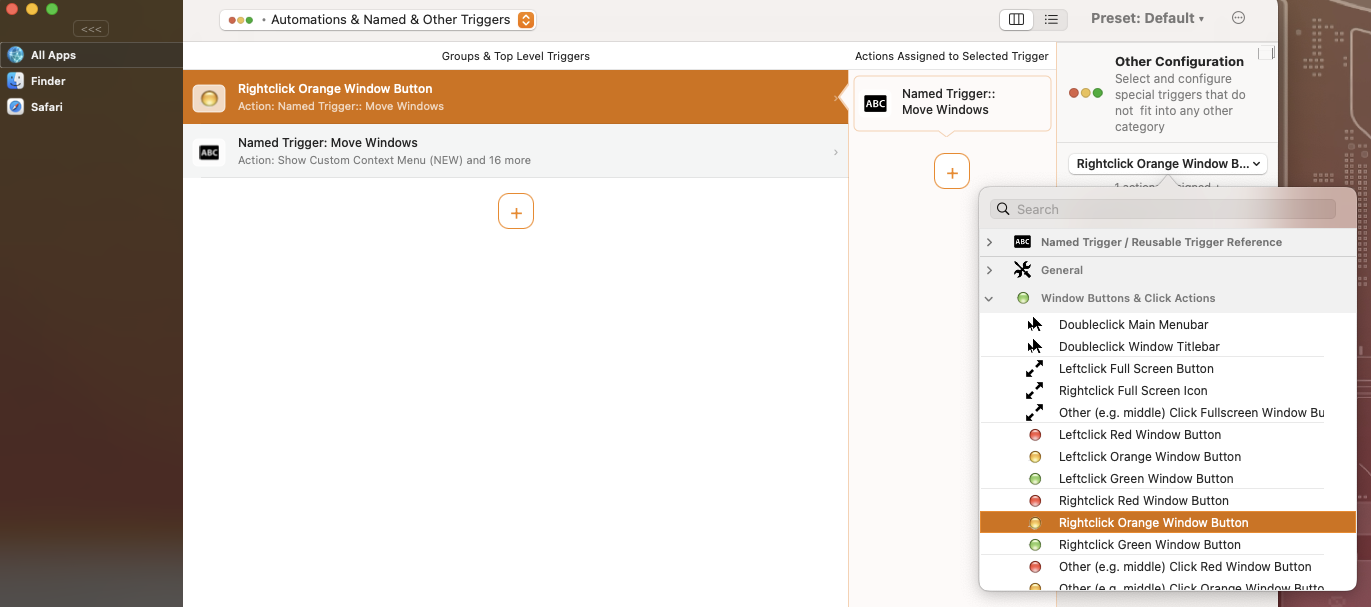
Go to the Automations and Named Triggers section of BTT and create a new Trigger.
Next, setup a “Reusable Named Trigger” and give it a name you can remember.
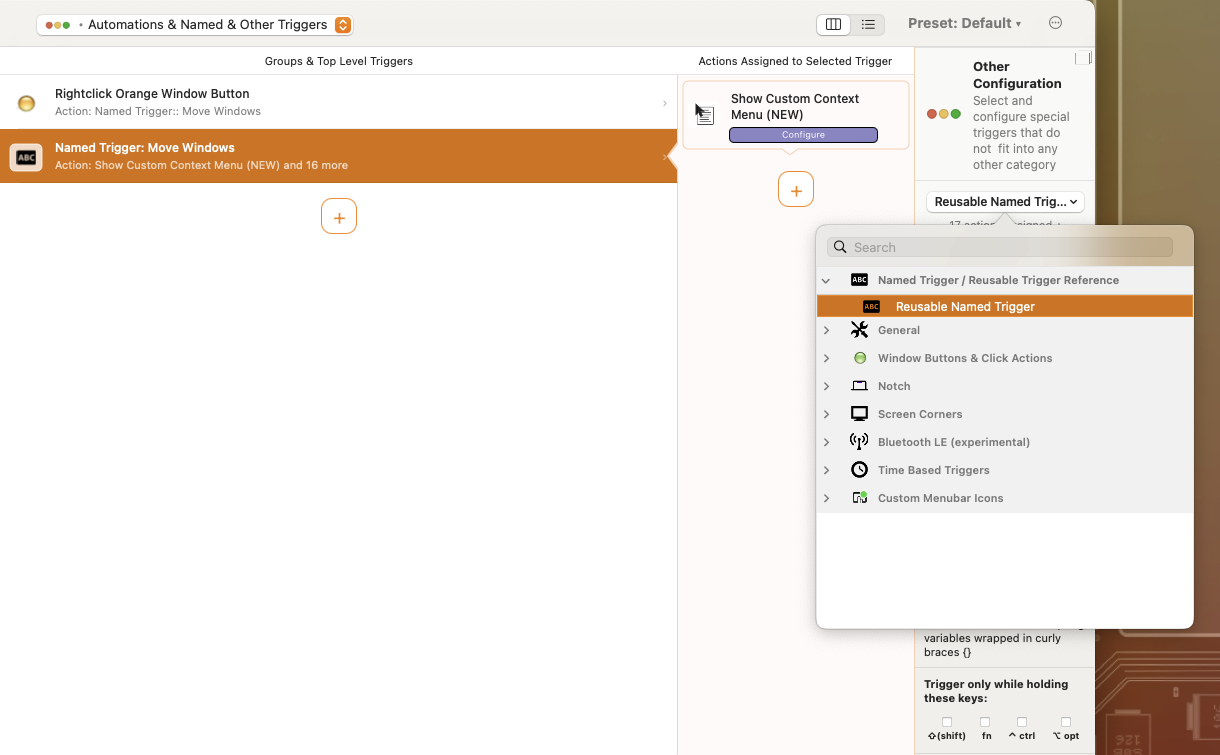
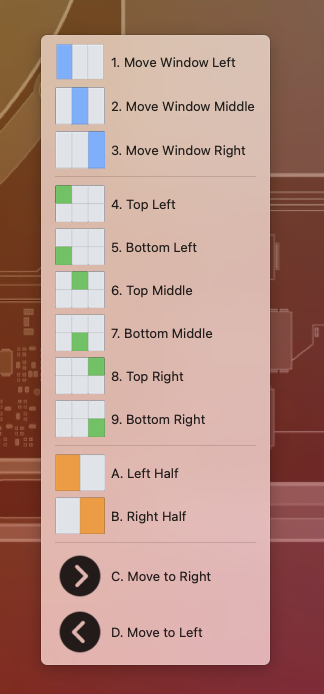
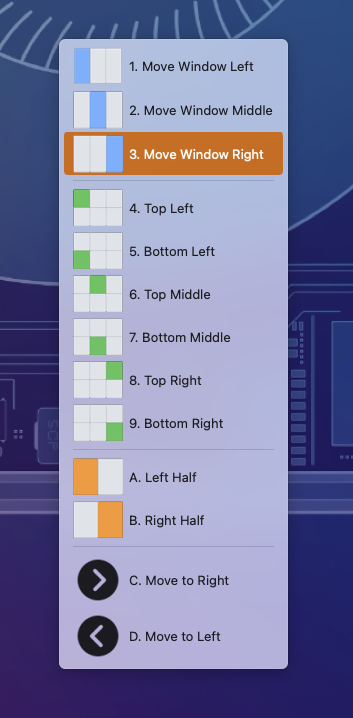
Now we’re going to create the “action” that will be run when this named trigger is, well, triggered. And, we’re going to be extra special about it. I want a single trigger to give me a bunch of options for moving my windows. The BTT action named “Show Custom Context Menu” is what we’ll use. Here’s what the complete context menu looks like:
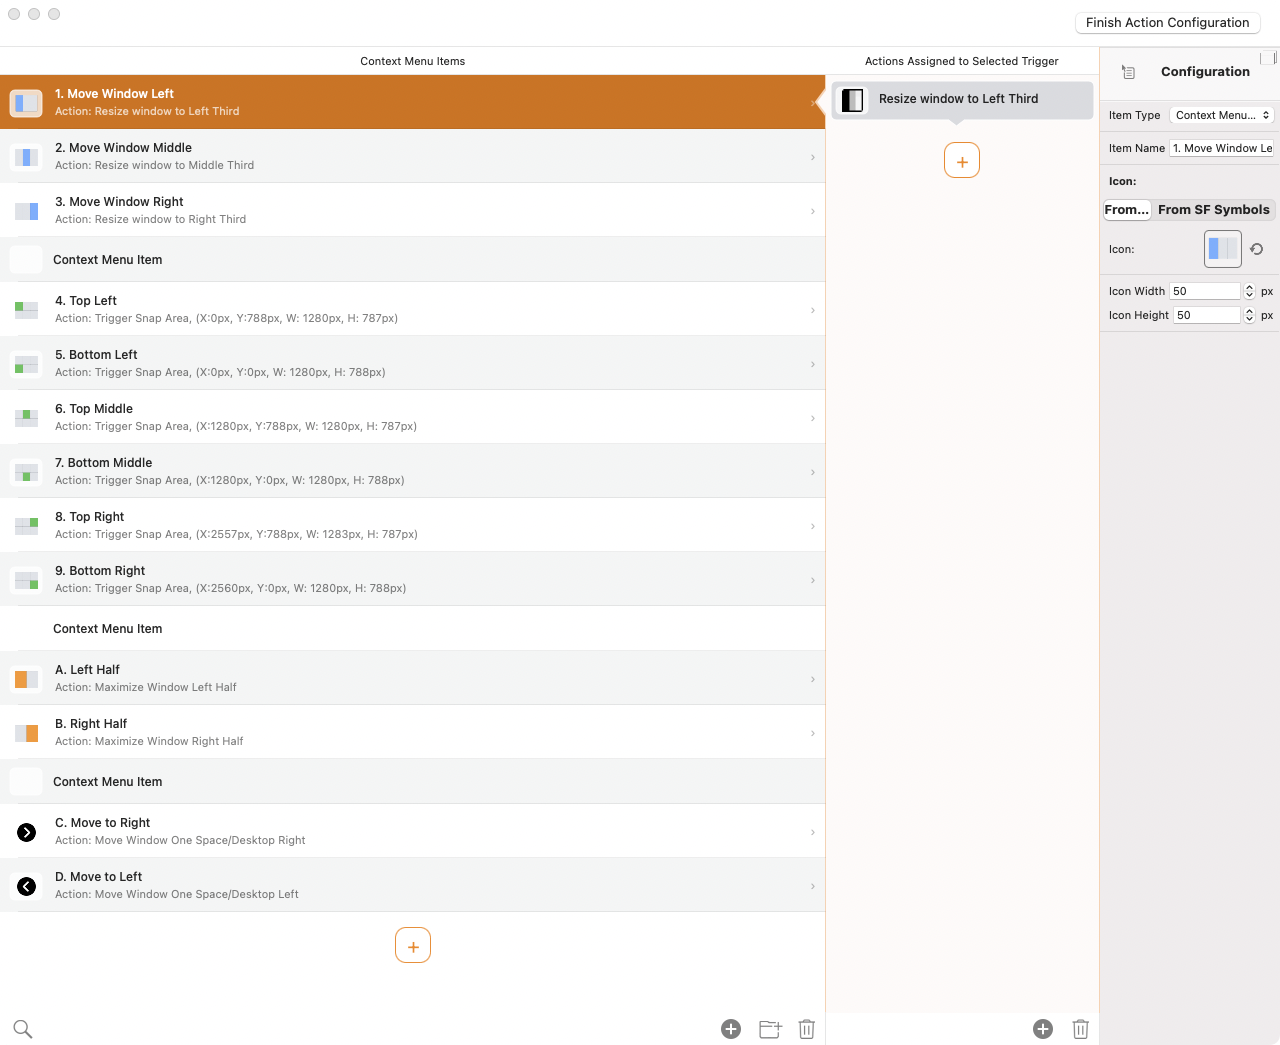
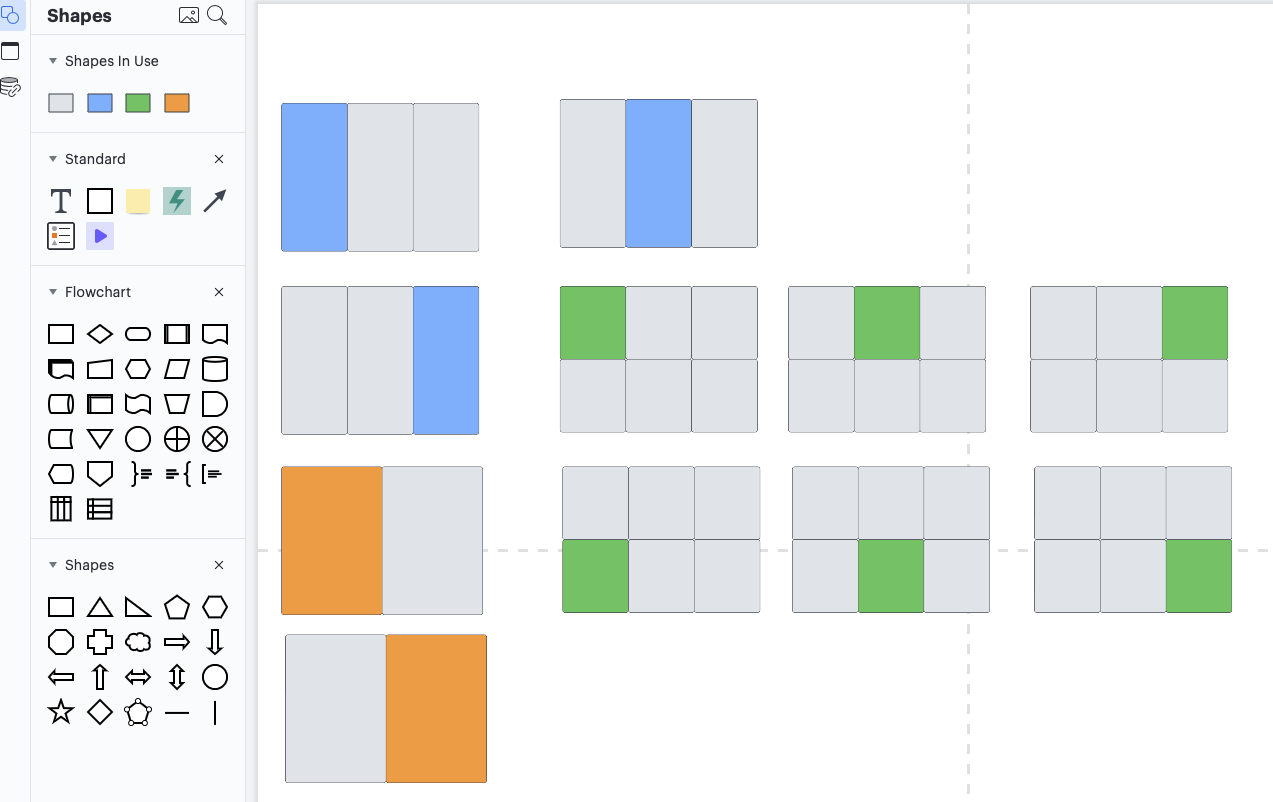
Each context menu item is bound to a different window resize and move action. For the first three menu items I’m using the built-in convenience actions of “Resize window to Left Third”. The advantage of these built in actions is that the work with any monitor size equally well. In the configuration pane we setup the name, icon dimensions and any custom icon to display in the menu.
For the names, I find it convenient to give them numbers and letter prefixes and I’ll explain why in a couple of paragraphs.
Another Diversion - Makin' Icons
BetterTouchTool includes several collections of icons to use throughout the app. These can be used to annotate the triggers within the app but they can also be used in your custom menus. I wanted something that would be a bit more informative than the black and white sets included in BTT. I’m a big fan of OmniGraffle for making detailed icons but for simple stuff I prefer to use Lucidchart, which is one of my most used tools each week. Lucidchart has a good set of shapes, nice default colors, and excellent export features. For this little project I created a set of grids with different colors and exported as PNG with transparent background.
Finishing the Named Trigger
BTT didn’t have pre-set window locations for all of my use cases so I took advantage of the BTT “snap areas." These are user defined areas of the screen to place a window. I’ve setup a variety of these that match the hex-grid shown in the icons. I just needed to configure the snap areas through the BTT menu bar service first.
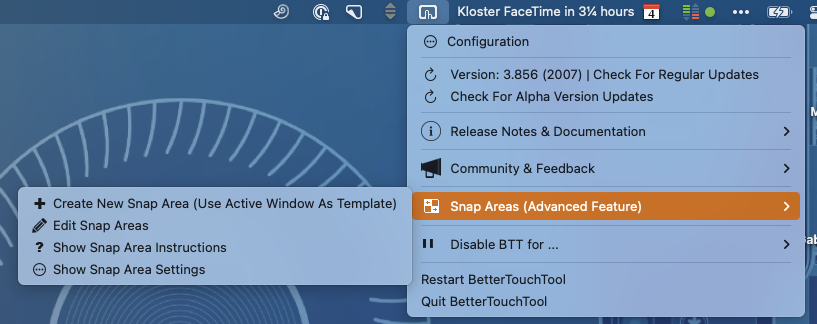
With the new snap areas set up we can head back to our Named Trigger and configure the rest of the menu items by using the Trigger Snap Areas..

Using the Trigger for Window Positioning
Now that we have our Named Trigger all setup with the window positions, we need a way to call it. Let’s make two new triggers and see our handy work in action.
Trigger on Left & Right Press
This will bind our Named Trigger to clicking both the right and left mouse buttons together. We head back to the Normal Mouse configuration and add a new trigger. We have to use the “Advanced” configuration to make this work. We do this but selecting our new trigger and then switching to the Advance configuration and adding some Advanced Conditions.
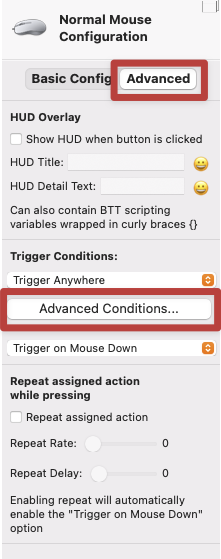
Advanced Conditions are a new BTT feature and allow us to do some interesting things with button presses. What we want is to trigger this menu when both the left and right buttons are pressed down.
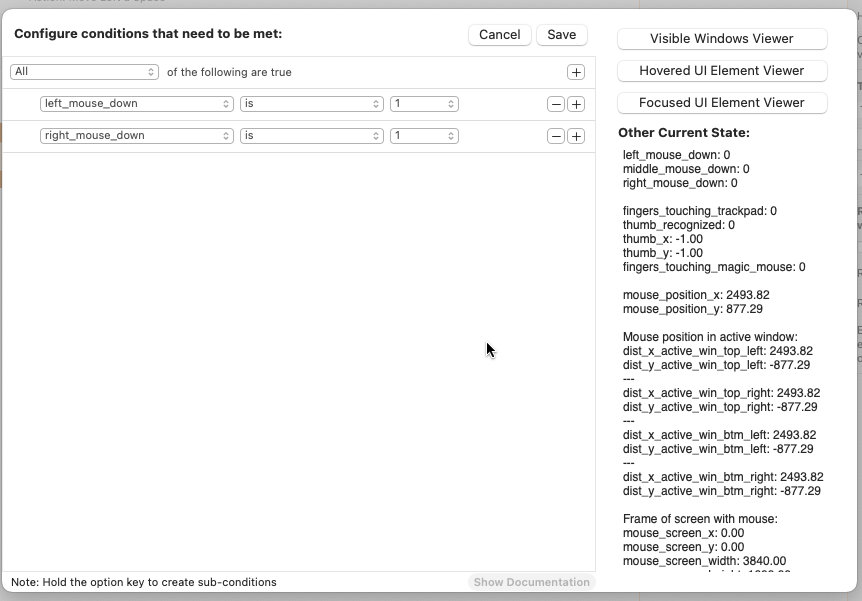
Now we head over and add the Action to our trigger. We use the Named Trigger action and provide the Named Trigger name we created earlier. Once this is saved we can click the right and left buttons simultaneously anywhere on the screen to get a popup menu to choose a window location. Selecting one of the items in the menu will move the front most window to the desired location and size.
Trigger on Right Click Minimize
We can also reuse this named trigger to add some new features to the macOS window minimize button. We setup another “Automation” trigger that is activated when we right click on the little yellow control button on almost every macOS window.
Since we reused the named trigger, anytime a new window position is added it will be available for all of the other triggers without any extra work. It’s so nice to be able to right click and simply pop a window to a new position or Space.
Fin
So that’s some of what I’ve been up to over the past 10 months. I guess it was a hiatus, or early retirement from the internet, or just a general malaise. Either way, Macs are still fun and I still really love what I can make them do with the right software and some patience.
-
Unfortunately my wrists lead me to the conclusion that the “Magic” is not good for my health. My Logitech mouse is more ergonomic even if it has less magic. I wish the Magic Mouse was more comfortable because a touch surface on the mouse is kind of neat. Instead I have a touchpad to the left of my keyboard. ↩︎