Keyboard Maestro Window and Application Switcher
Introduction
Keyboard Maestro is a jack of all trades. It’s about a dozen applications in one. In addition to being a macro execution service, right out of the box it can be an application and window switcher, app launcher and window manager with little, if any effort.
I’ve recently moved from a 27" iMac to a “smaller” 15" Retina MacBook Pro, which means window and application management is a bit more important to me. So, let me regale you with Keyboard Maestro’s application switcher functionality.
The app switcher is built around actions that can also be used in more complex macros. There are several Switchers available:
- Application Switcher
- Window Switcher
- Clipboard Switcher
I’m going to focus on the application and window switchers. The clipboard switcher needs some more context so I’ll save that for a later date (maybe).
General Setup
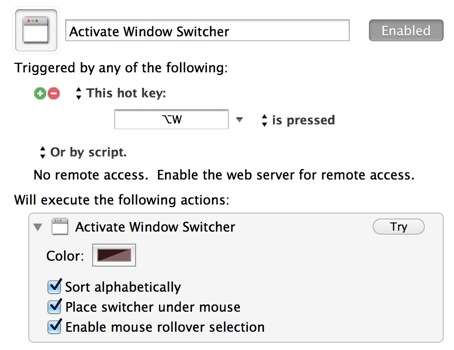
The very first thing I do with all switchers, is change the color setting. The default setting is not attractive to me and I prefer a simple dark bezel around the switcher. Only the application switcher provides an option to change the icon size. I’m not sure why but I keep the default size and the icon grid option.
I also change the default triggers for all switchers to something other than cmd-tab. I still like the OS X cmd-tab for simple application switching. It’s fast and I’ve already been trained to use it. There’s also a synergy between the two functions, as I will describe.
Application Switcher
I use the KM Application Switcher the most. There are some powerful extra features that make it a good addition to my toolbox. Here’s an example:
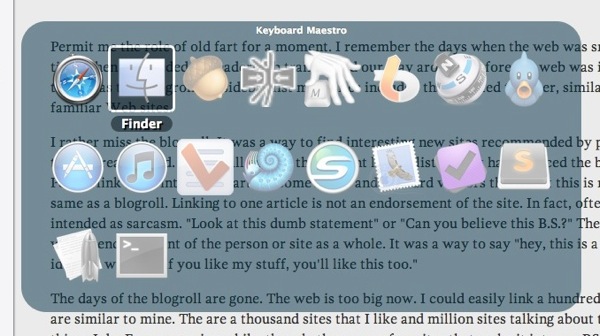
Inactive (hidden) applications are displayed with a transparent icon. The applications are ordered in sequence of last use (although that can be changed). I also prefer the compact grid view but there are several available, including a CoverFlow view.
Applications can be selected by tabbing, arrows (while the trigger is pressed) or mouse.
Options
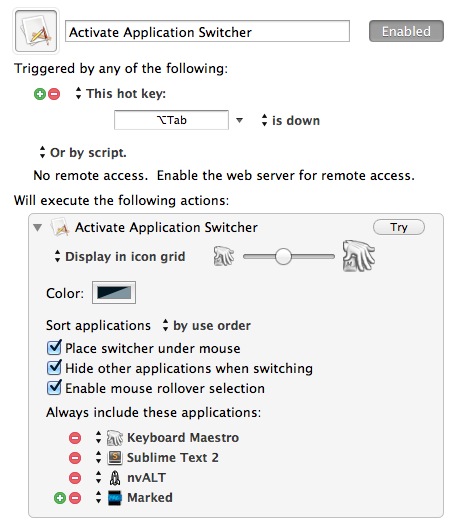
The Place switcher under mouse option means the palette will be revealed just under my current mouse cursor. This is great for working on multiple monitors.
Hide other applications when switching is for people that hate open windows. It hides everything else when I switch to another application. Now that I’m on a MacBook Pro, I really like this option. It keeps the window clutter down. This is where the built in ⌘+tab switcher fits. If I want to reveal another application, I just ⌘+tab over to it and select it. If I want to focus on one application I use the KM switcher with option+tab.
Enable mouse rollover selection is similar to the OS X switcher and allows an application to be selected with the mouse.
There’s also a little sugar that can be added, like the Always include these applications option. It turns the switcher into a combination of application launcher and switcher. Normally an application switcher only shows open applications. But the KM switcher can also include default applications that I may want available at all times, regardless of whether they are currently running. They appear as an inactive application icon and selecting it from the list launches the application.
Sure, I could launch the app with LaunchBar, but I generally expect my text editors to be open.
Here are some nice keyboard triggers built into the application switcher that up the ante. I purloined this list from the official Keyboard Maestro page.
•   Press “q” to mark (or unmark) an application to be quit.
•   Press “k” twice to mark an application to be force quit.
•   Press “s” or “h” to mark (or unmark) an application to be hidden.
•   Press “l” or “z” to mark (or unmark) an application to be launched.
•   Press “a” to hide (or show) “always included” applications.
•   Press “e” to show (or hide) “always ignored” applications.
•   Press “c” to select the current application.
•   Press “f” to select the Finder.
•   Press “d” to switch directly to the current app and hide other applications.

Window Switcher
The window switcher is an odd one for me. I’ve grown accustomed to the convenience of the built in OS X window switcher available through the application switcher. In OS X, hitting ⌘+tab followed by the up arrow or down arrow shows an expose view of all the windows for the selected application. This shows all windows in all spaces.
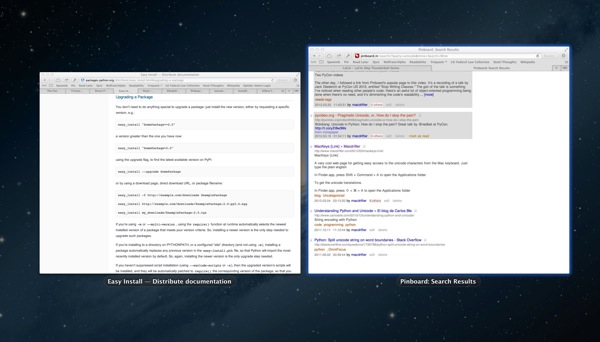
On the other hand, the Keyboard Maestro window switcher only shows windows for the current space. From what I can tell, there’s no way to see all windows in one list. However, the window switcher interface is pretty nice. It can be customized in a couple of limited ways.
The interface for the window switcher is very compact. Windows can be selected with the up and down arrow keys and applications are selected by left or right arrows.
The window switcher has the same options as the application switcher. The most significant difference is that the panel can only be displayed in CoverFlow mode.
As with the application switcher there are a couple of useful keyboard triggers.
•   Press “q” to mark (or unmark) a window to be closed.
•   Press “s” to mark (or unmark) an window to be minimize.
•   Press left or right arrow keys to scroll through applications
Application Launcher
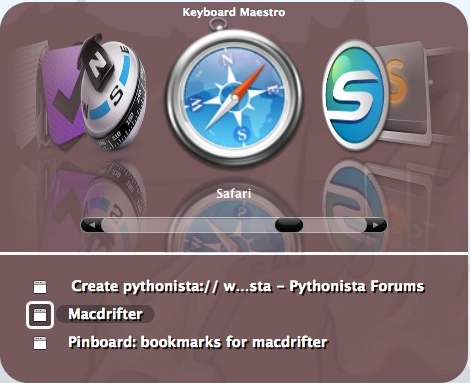
The Keyboard Maestro application launcher is relatively simple. I’ve written about it before. The launcher is configured with a combination of preset apps and optional recent, running, all applications, and utility applications.
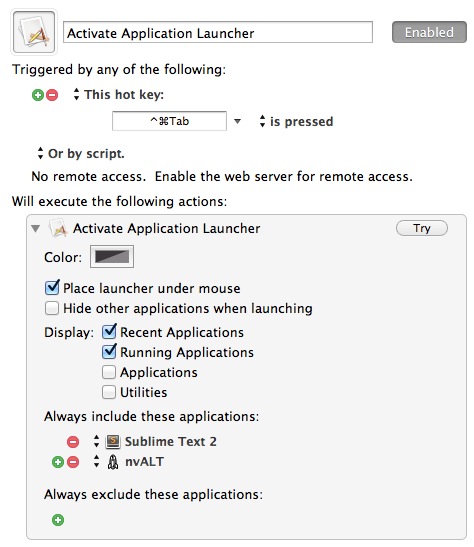
When activated, the applications are displayed in a CoverFlow pop-up.

Conclusion
While the Keyboard Maestro application and window switchers may not be the most feature rich and attractive options, they expand on the default OS X behavior enough to add them to my workflow. Importantly, they come with Keyboard Maestro right out of the box. Other than setting a trigger, there’s little configuration to perform.