A Quick Tour of Keyboard Maestro Fill-In Snippets
A few people have asked me about replacing TextExpander fill-in snippets using Keyboard Maestro. While I think Keyboard Maestro is pretty easy to work with, it’s very different than a single purpose snippet expansion tool. Here’s a quick breakdown of a macro for responding to email. It opens a prompt and asks a few questions about the message and then inserts a draft message into an application window.
Variables
Keyboard Maestro lives and breathes with variables. Variables are used to store bits of information.1 One action writes some info into a variable and another action can read a variable down the road. Actions can change variables or simply evaluate that they exist.
Here’s how I think about fill-in snippet generators in KM. A form asks for information. Each piece of information is stored as a variable that will then be used to create a snippet. In the example below I’m creating a mail message through a few simple prompts.
Asking for Input
There are a few types of input I need when replying to a message. I need the recipients name, the main topic I’m responding to, and the final closing line of the message. Using the Keyboard Maestro action “Prompt for user input” it’s pretty easy to ask for these basic pieces of information. I can create free text fields or dropdown selectors. I can also add control buttons (more on that later).
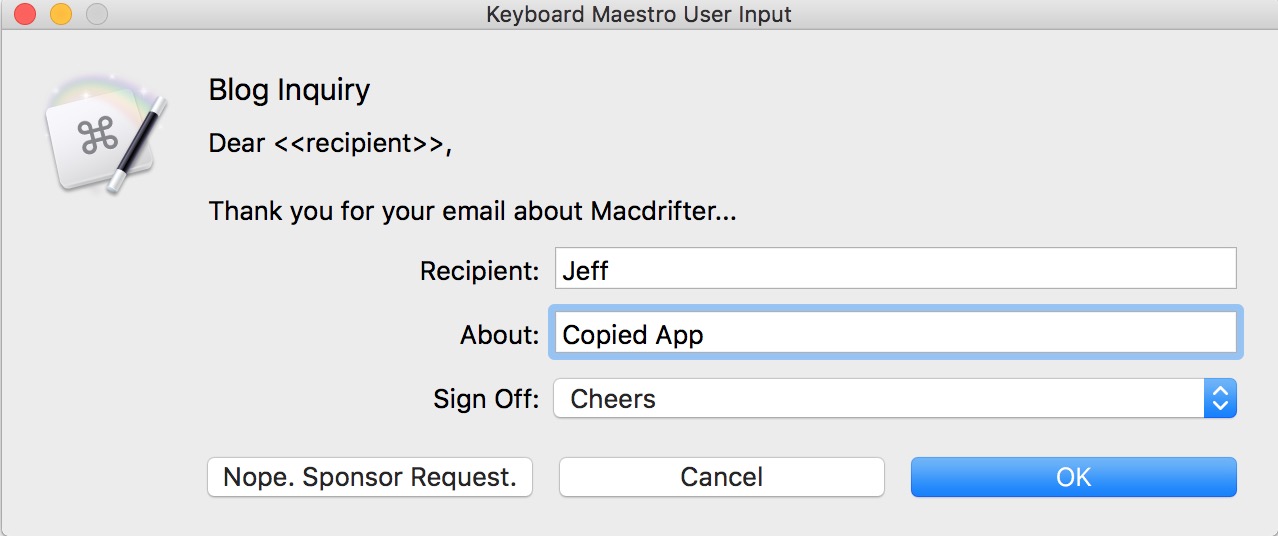
Here’s the action that generates that form:
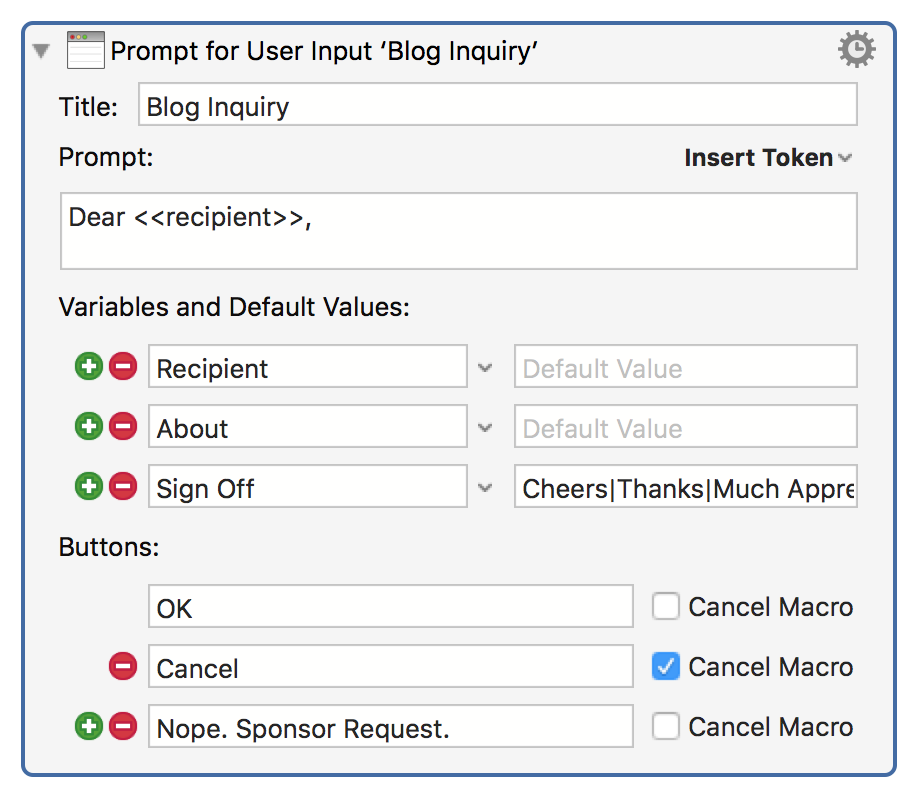
The “Title” and “Prompt” fields tell me what this snippet is going to do. I try to make this as explicit as possible. I don’t need to see to much but I do want a reminder of exactly what this macro is going to accomplish. In this case it’s going to create a response for an email sent to my blog address.
I name variable parameters “Recipient”, “About”, and “Sign Off” and provide default values where appropriate. Defaults are just text that will already be in the field when the form is presented. Separating default values with pipe characters creates a dropdown list to choose from. In this macro I have a few of my most commonly preferred closing lines.
Also note that I created another button called “Nope. Sponsor Request.” If I click this button, the name of the button is stored into a variable named “Result Button” which I then evaluate further down the macro.
Making Decisions
There’s a couple interesting features to point out in the next macro step.
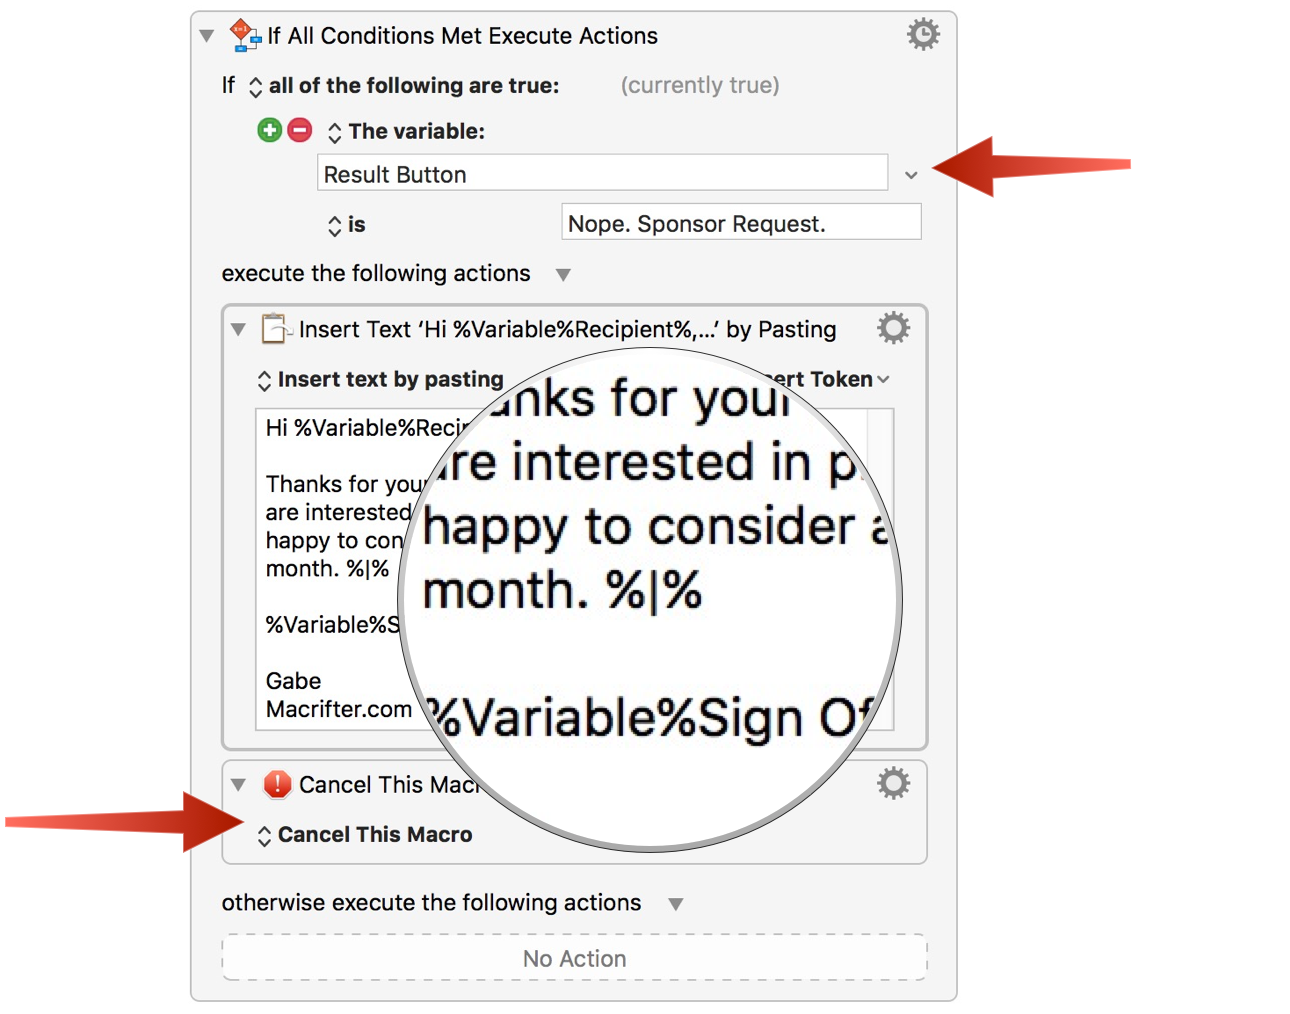
It tests to see if the “Result Button” was set to “Nope. Sponsor Request.” I do this because sometimes I get emails that are asking about blog sponsorships. I don’t want a separate text expansion shortcut for these. In that case, I can fill out the form and click the “Nope” button to get a more appropriate response.
The step first checks the “Result Button” variable mentioned above. If the text in the variable is equal to “Nope. Sponsor Request.” then it expands a snippet, positions the cursor and then stops any further macro evaluation.
Text Expansion
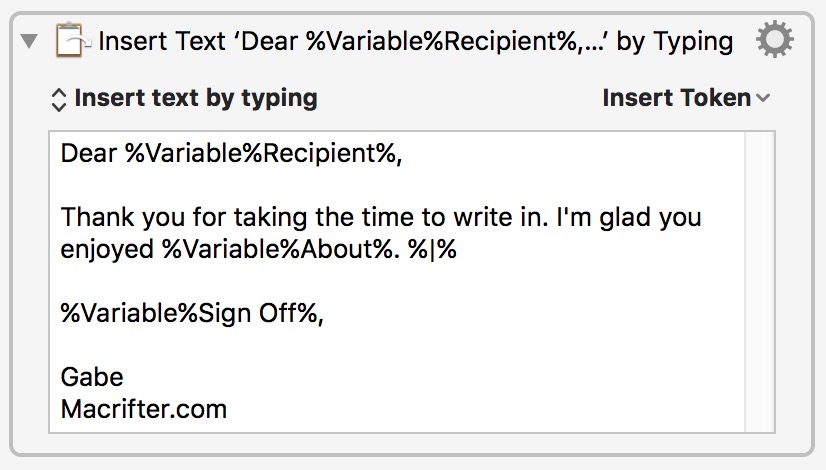
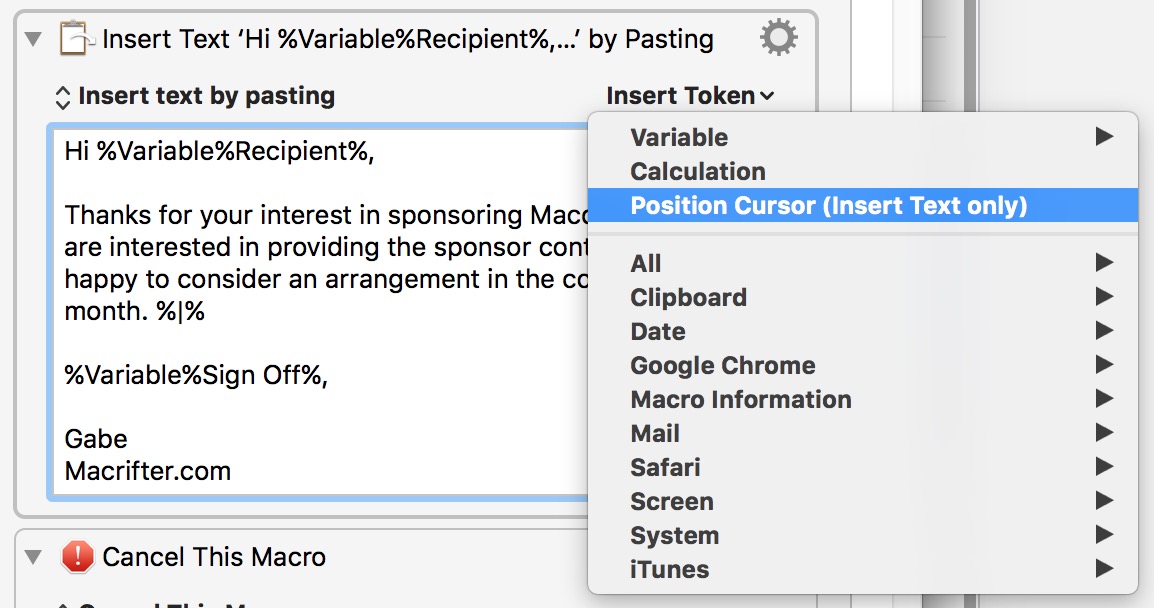
Editing the snippet text in KM is not much different than other utilities like TextExpander. I type up the message body and insert the variables as placeholders. I also want to position the cursor in the expanded text so I can add some more personalization to the message. To do that, I place the cursor inside the text box for the action and then insert the snippet placeholder for the cursor.
Pasting or Typing
KM has two options for inserting text snippets into other applications: Pasting or Typing. A pasted snippet is first loaded onto the clipboard and then is pasted in as a block. This is fast. Cursor positioning adds some additional delay but it’s not too bad for short snippets. It will also put the text on your clipboard in the process.
Typed snippets are really convenient when working in web-forms that restrict pasting. The action types out all of the characters in a snippet by simulating keyboard input. Pick the variant that solves your problem the best. I’ve mixed in both types in this macro for educational purposes.
Here’s the complete macro as an image:
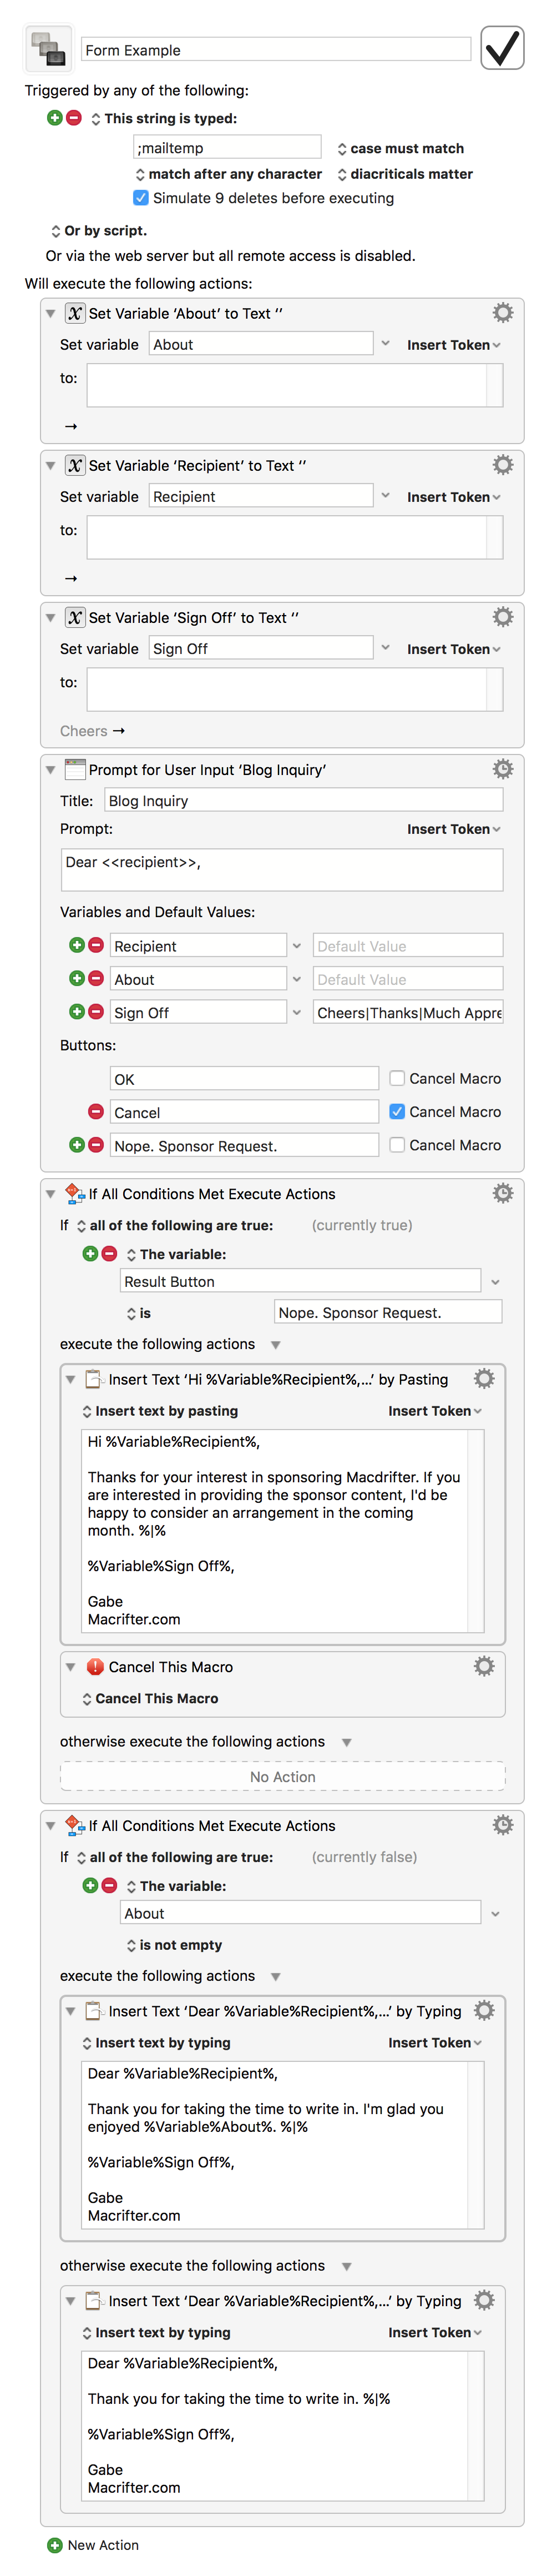
Be sure to look through the Keyboard Maestro wiki for more information about handling user input.
-
The first few steps of the macro just clears the values of the variables. KM variables persist between restarts. I like to clear them before a macro runs. You can also delete the variables instead. ↩︎