Redaction and Annotation With Pixelmator for iOS
On my Mac, I’m a pretty big fan of Napkin and Acorn for annotating, cropping, and redacting images. They have all of the tools in one place and they all work well together. Napkin is easy to use but Acorn has real layers and loads more control.
While there’s a wealth of options on the Mac for image annotation, there are very few complete options on iOS. PointOut is wonderful for creating magnifier callouts but not much else. Pinpoint has really easy redaction, annotation and arrows but nothing more. Omnigraffle has everything plus a great deal of control but it’s too many taps to do anything basic.
The winner in my world is Pixelmator for iOS, which may not be an obvious choice for simple image markup. Here’s how I use it.1

Working with Screenshots
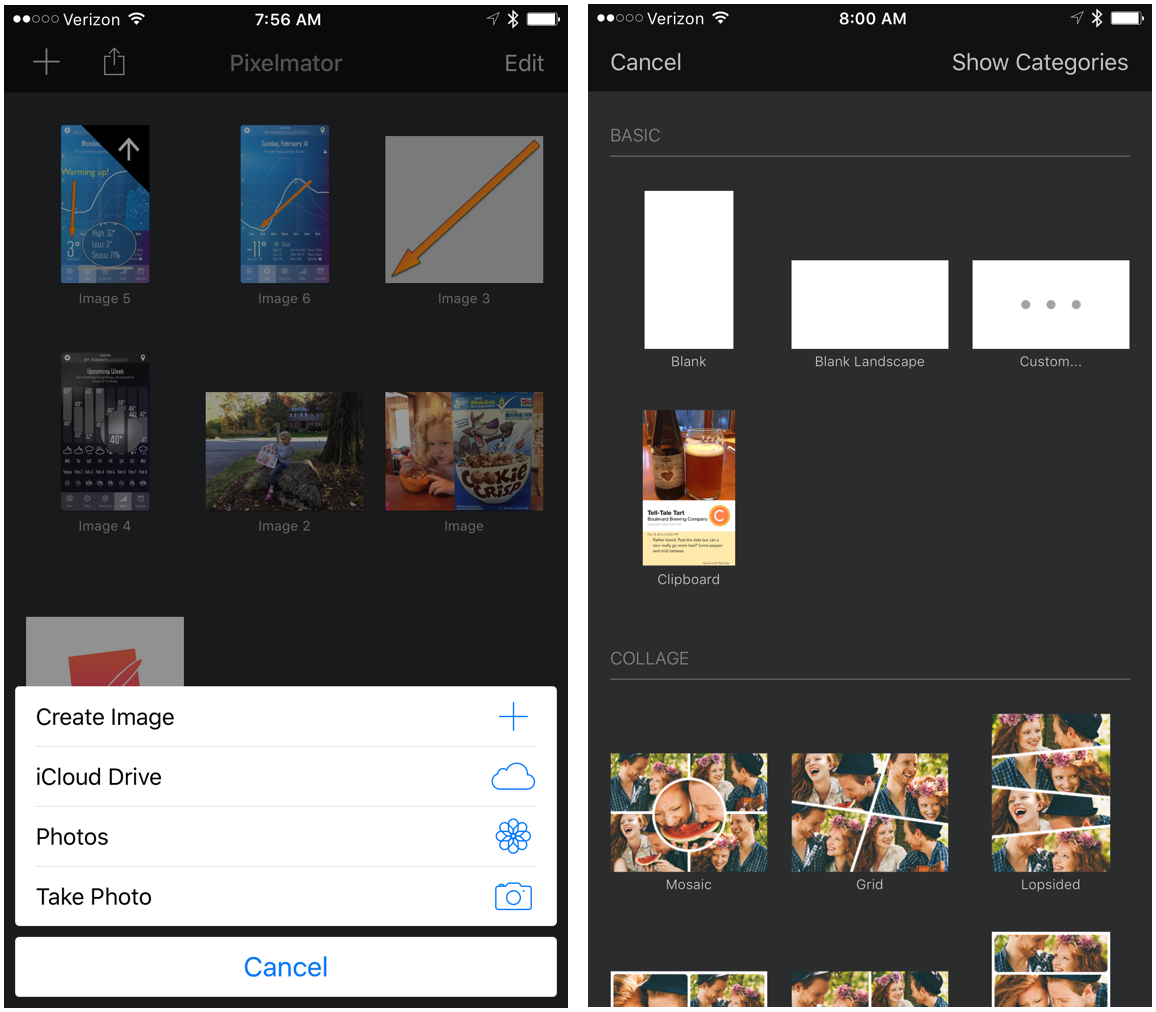
I get started by taking a screenshot on iOS and then I open up Pixelmator for iOS to create a new image. It’s pretty self explanatory but Pixelmator has few options to use as the basis for a new file. I mostly use the “Photos” option.
But, there’s a little hidden treat in Pixelmator that’s worth mentioning. If I have an image on my pasteboard in iOS and then choose the “Create Image” option, Pixelmator offers to use the image as the basis of the new file. That’s pretty terrific.2
When the new file opens in Pixelmator, the top menu may obscure part of the screenshot. I just pinch and zoom out on the canvas to see everything. I also really like the two-finger pan gesture to move around the image.
Redaction
I run a classier operation than the government, so when I redact an image I want it to look nice. Luckily, with a super-computer, I can do a lot better than a black bar by using Pixelmator’s smudge tool. This is an easy effect and requires very little effort. Select the the paintbrush icon and then choose the “Retouch” tool. Mine is almost always set to “Smudge” but if I’m working with photos I want to clean-up there’s more power under the hood.
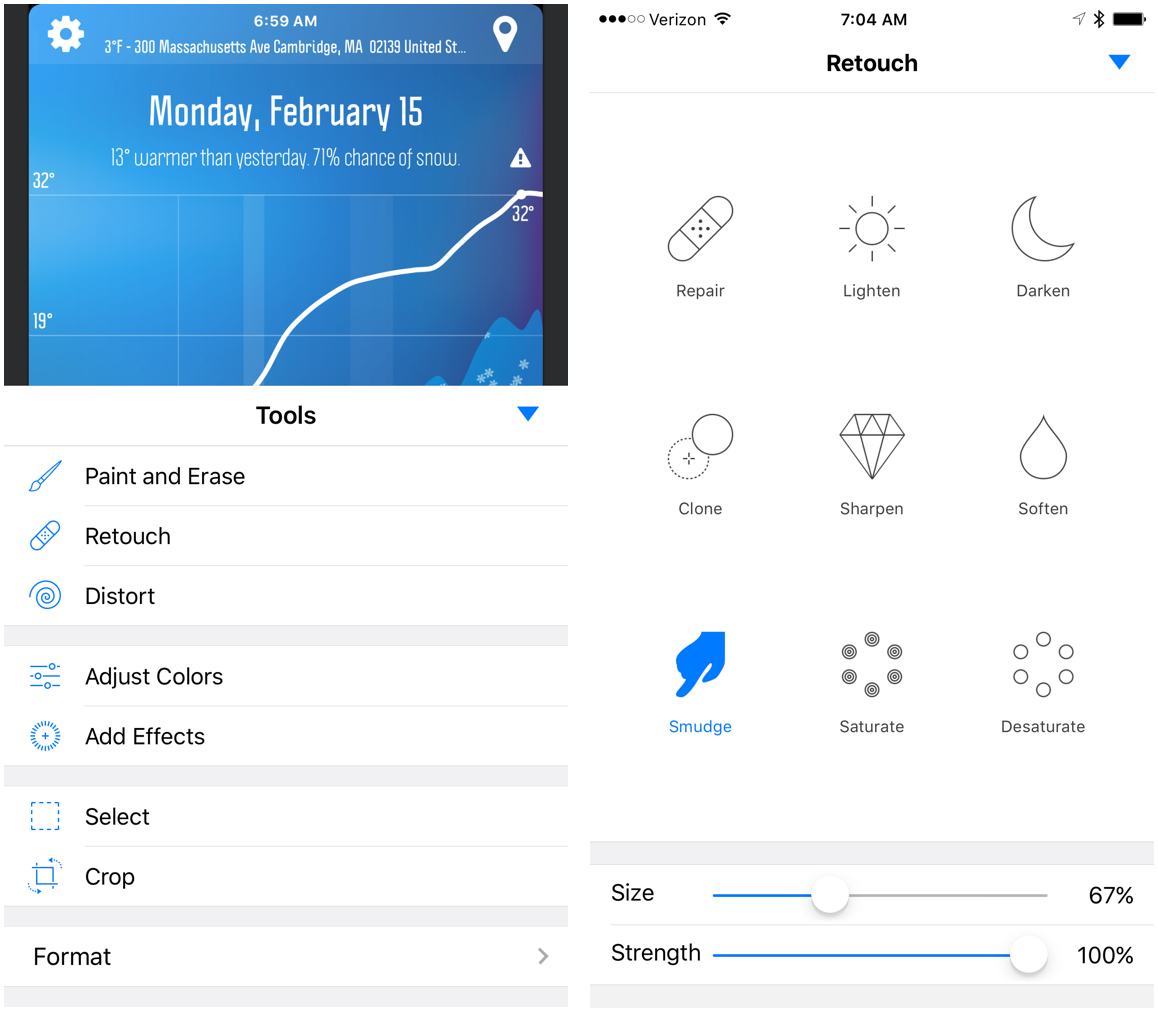
With the Smudge tool active, I just swipe anywhere on the image I want to redact. The information is obliterated and leaves no more than a grease smudge behind.
Callouts
The people that say a picture is worth a thousand words never tried to communicate a joke through screenshots. Very often I want to call attention to a specific element and that’s where a nice little callout is valuable.
One of my favorite callouts is the magnify loupe where a specific area of an image is circled and magnified. An iOS app like PointOut is really the champ at this but it’s not good at most of the other things I want to do with an image. Fortunately, I can make these same effects in Pixelmator for iOS.
There are a few steps to creating a nice looking magnifier loupe. The first one is to create a shaped selection. I like the elliptical selection but feel free to go crazy with rectangles or freehand selections if that’s your thing. Tap the paint-brush icon in the tool bar and choose “Select.” You can change the shape by taping the the name of the selection type in the tool bar.

Now that we have a selection we can use it to duplicate the region. This will act as our magnification layer. Just stretch this duplicate until it’s a good size. Pixelmator will keep it proportional as the corners are dragged. This is a perfectly acceptable callout if you’re an animal. Let’s polish it up a bit though.
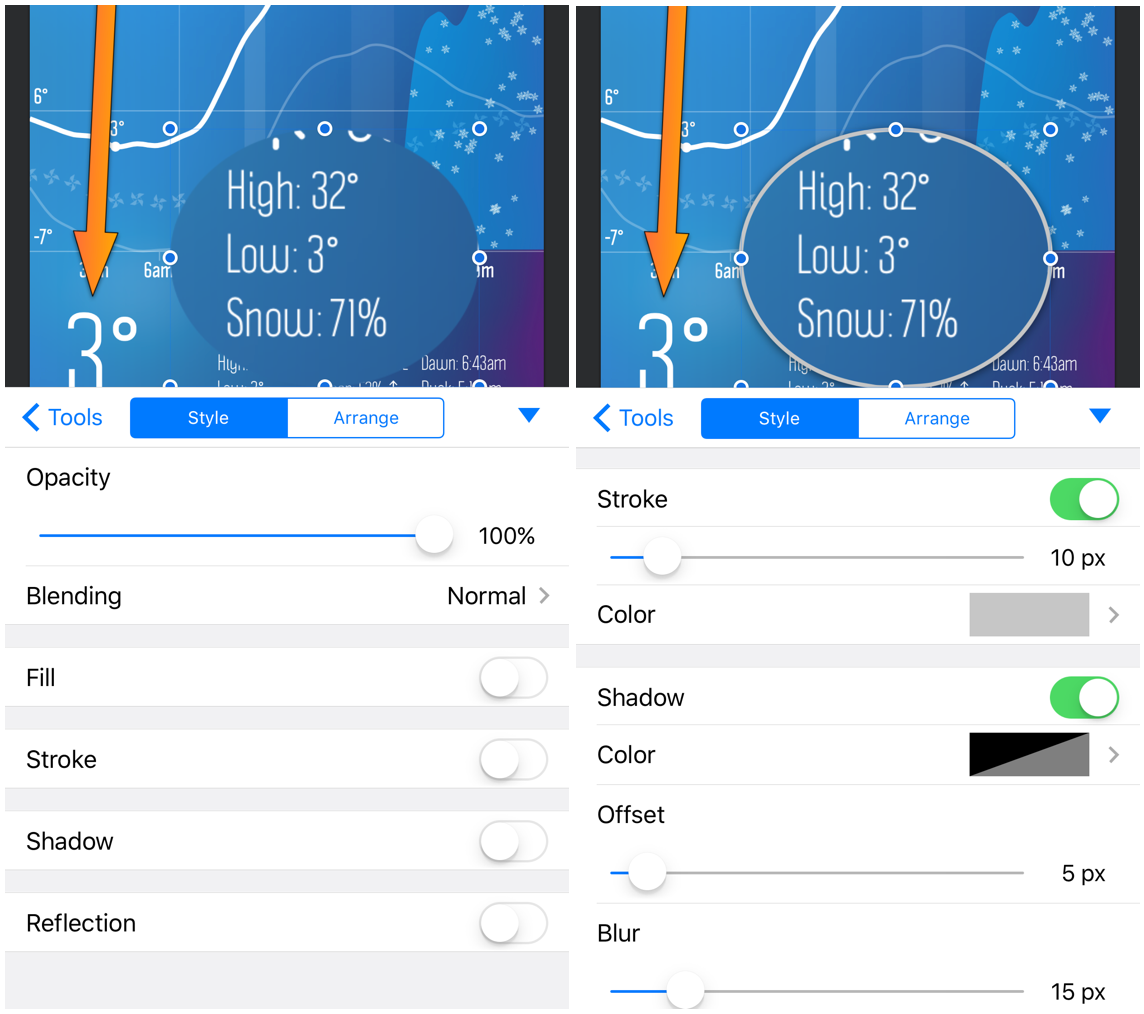
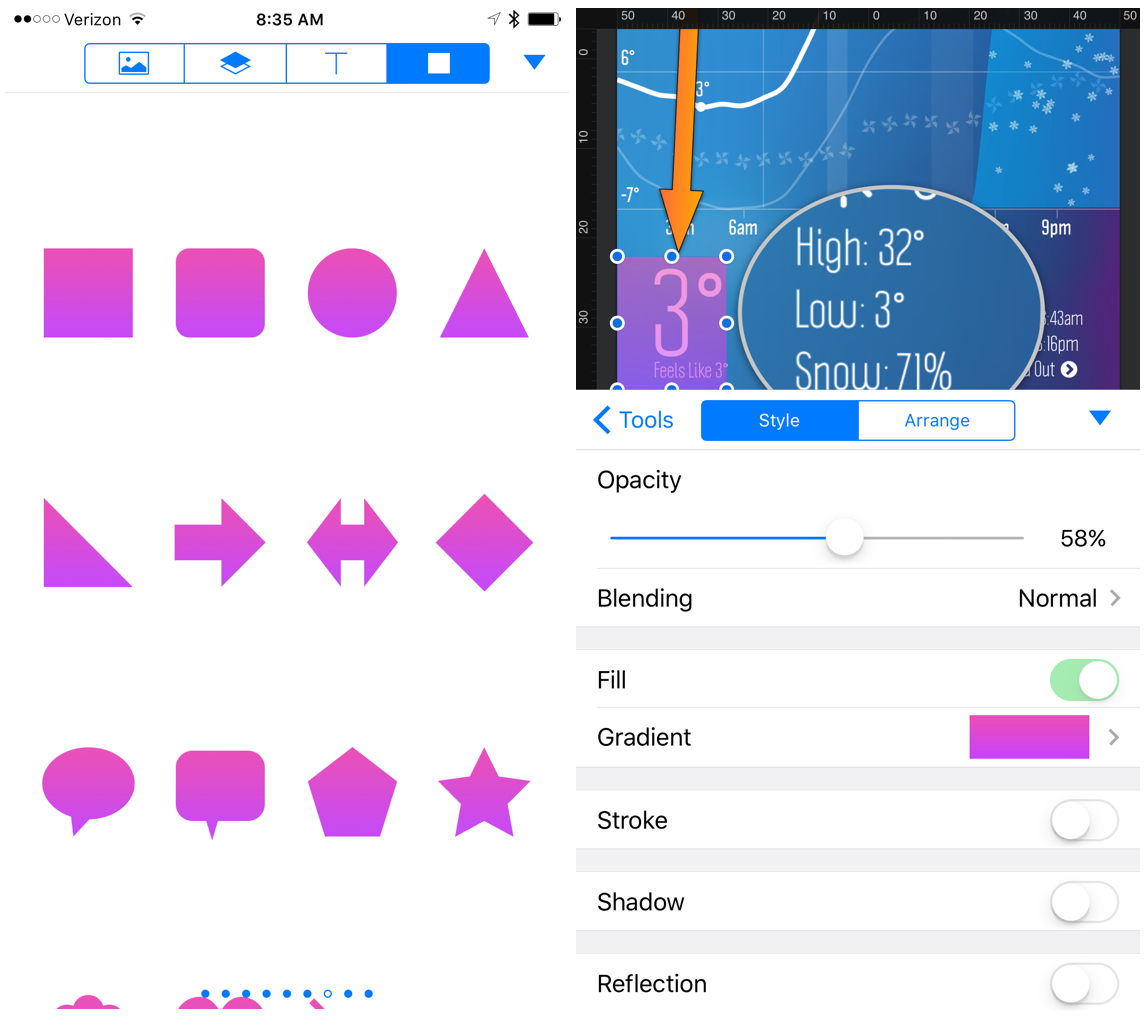
With the shape selected tap the paintbrush icon in the toolbar then choose the “Format” option at the bottom of the list. Next, turn on the “Stroke” for the shape. This is the outline for our ellipse. My preferred settings are shown in the screenshot above. I like a thick gray outline. Next, I like to add a shadow effect so the loop appears to hover over the image. Brains are weird and this tends to make it even more prominent. Do NOT use the reflection option. This reflects the selected region below and makes the entire thing a bit like an M.C. Escher painting.
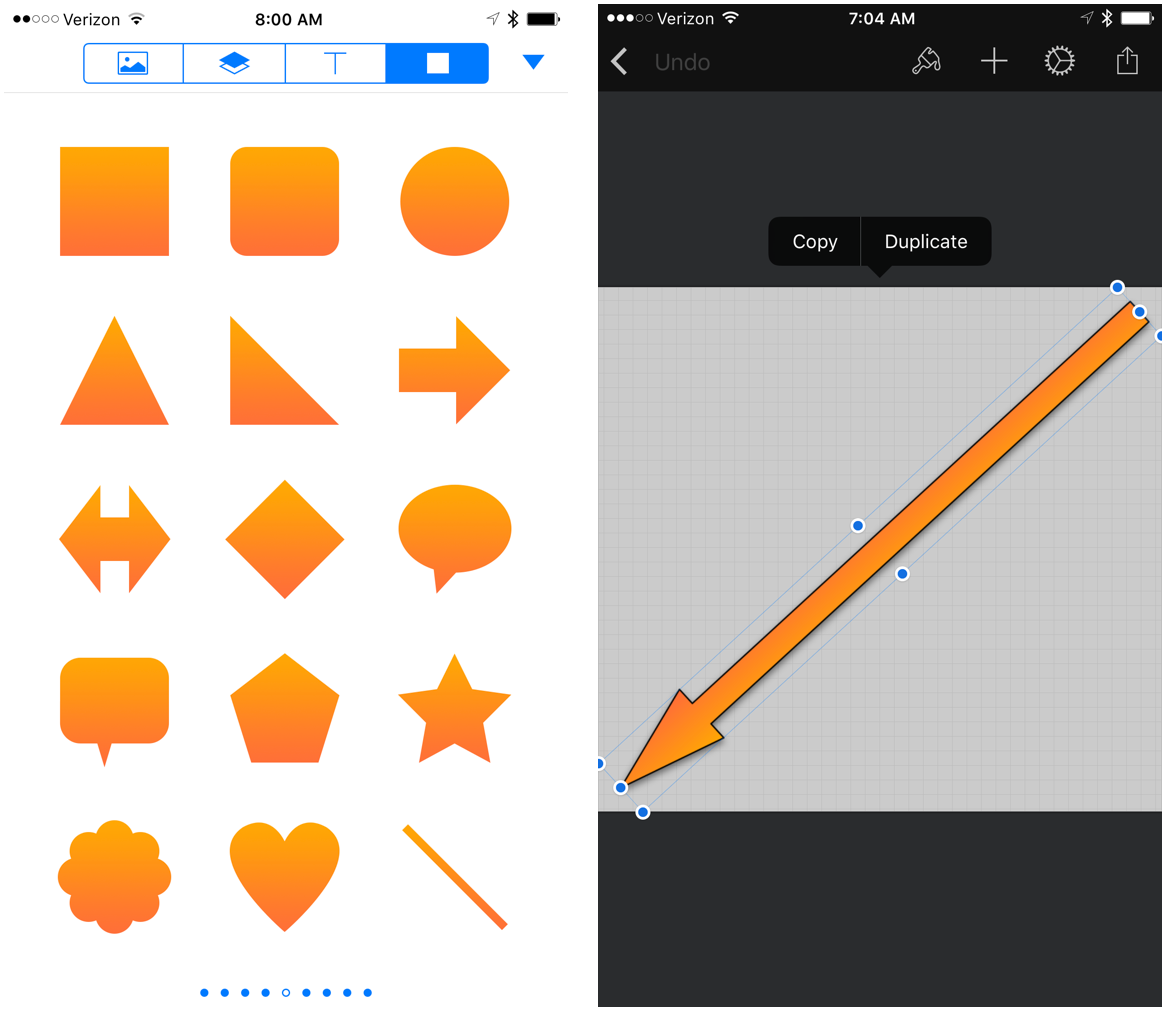
A loupe is easy to create and attractive but limited to a small region. Sometimes what I really need is a nice arrow. While Pixelmator has a few basic shapes, I find it tedious to add an arrow from scratch. Instead, I use a saved Pixelmator document that contains an arrow with the proportions I like. I can quickly jump into this document with two taps and copy the arrow to the iOS pasteboard.

Pixelmator provides quite a bit of control over shape sizing and positioning. Use two fingers to rotate the shape or use the format tools. I like the default color gradients in Pixelmator but prefer a nice outline and drop shadow. The real trick is getting the proportions right. That’s exactly why I tweaked all of these settings and saved my favorites in a separate Pixelmator document.
If I just want to create a highlighted region on an image, I insert a Pixelmator shape and then adjust the opacity. There’s not much else needed.
Text
Pixelmator has a lot of options for adding text to an image. There are almost too many options. That’s why I did the same thing with text that I did with the arrows. I created a separate Pixelmator document with text already formatted the way I like it. I just copy it and then paste into my screenshot. I can then use just a few formatting tweaks as needed.

Export
One of the great things about Pixelmator is how easy it is to get the image out when I’m done. Pixelmator supports the two most common image formats I need, PNG and JPEG.
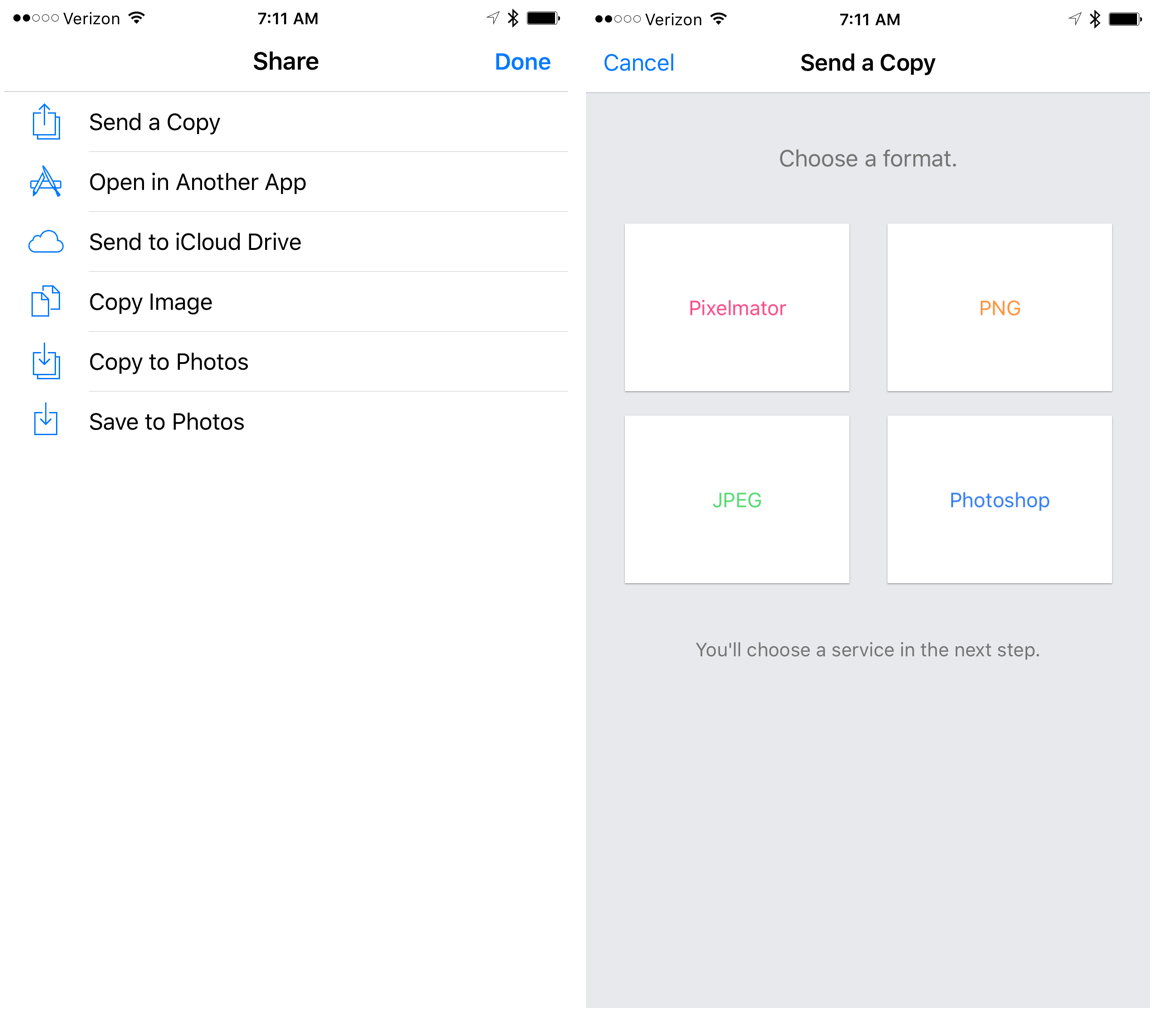
One of my favorite features of Pixelmator is that I can just export to the clipboard. This allows me to just paste into a Slack channel or share with my Mac through Copied.app.
Pixelmator for iOS | $5
Pixelmator for Mac | $30
Napkin for Mac | $40
Acorn for Mac | $30
PointOut | Free
Pinpoint | Free
OmniGraffle for iOS | $50
Copied for iOS | Free
Copied for Mac | $8
Weathernerd for iOS (shown in the screenshot) | $4