The Synology 1815+
Synology 1815+
I’ve used the Synology 1812+ for 2 years and upgraded to the 1815+ the day it was released. The 1815+ is an 8-bay NAS device powered by the Synology DSM software and is currently around $1,000 on Amazon without any drives. The 1812+ originally cost me about the same amount and I’ve had no issues with it since the original purchase.
Why upgrade
Does anyone ever really believe their reasons for upgrading? I wanted more performance out of a piece of hardware that I use more than almost any other computer I own. My Synology pretty much powers my house at this point. Investing in a version with more resources didn’t take much imagination.1
CPU
The entire reason I wanted to upgrade from the 1812+ to the 1815+ was for the improved CPU options. The 1815+ sports a quad core 2.4GHz Intel Atom C2538 which, as expected, is noticeable. With multiple users and applications running, I’ve seen far lower CPU loads on the 1815+ than the older 1812+.2 I’m using the exact same services, like Plex, SFTP, DS Photo and Camera Station but the CPU never seems to creep above 25% on the 1815+ outside of extraordinary usage like re-encoding 1000s of home videos.
RAM options
Similar to the 1812+, the 1815+ has user upgradeable RAM. I maxed mine out for a modest price of $40 for a 4GB module. That’s double the available RAM on the 1812+. You can go above 6GB of RAM by changing the motherboard module but that’s not supported and probably voids any warranty. My 1815+ usually stays below 50% utilization of the 6GB with Plex and a large menagerie of other services running.
Other
Other than CPU and RAM, the other major additions to the 1815+ are nothing that concern me. There’s now 4 x Gigabit Ethernet and each pair can be bonded into a single aggregated connection (more below). I only need one bonded pair. There are also more USB3 connections on the 1815+ but I rarely need to connect that many external drives to my NAS. I do like the new screw-less sleds in the 1815+. It’s simple and quick to change out a disk yet the drives are anchored in place firmly. It’s a nice improvement over the 1812+.
Setup
SSD Caching
Several of the Synology models support SSD caching. You’ll need one disk for read caching and one for write caching. While the Synology can provide a recommendation for the total caching size based on storage and access demands, there’s a RAM cost for each MB of SSD cache. I’ve added two 120GB SSD cache disks. They are about $87 each and from what I can tell, greatly improve the performance.
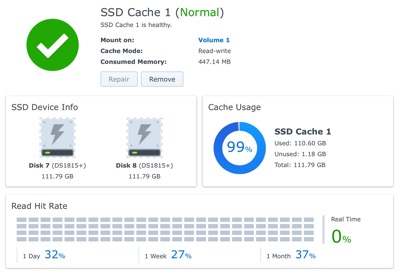
The built-in cache advisor tells me I should have at least 500GB of SSD space but that’s too much for my taste. Every 1 GB of SSD cache requires approximately 4 MB of system memory which means 500GB read and 500GB write would be 2GB of RAM. Synology has a rather nice white paper on their caching model.
Volume selection
I typically recommend keeping entertainment media and file archiving on separate volumes. This let’s you tune performance for the aspects you care about. If you’re concern is for redundancy then you’re going to need to allocate even more space to higher RAID settings. I use the SHR RAID option which allows for one drive failure at a time. It’s a risk but with a low likelihood of two disk failures, it’s a risk I can tolerate. Recommending a volume configuration is about like recommending underwear. Only you know what your personal comfort level is. I do question going commando though.
Performance
Data transfer
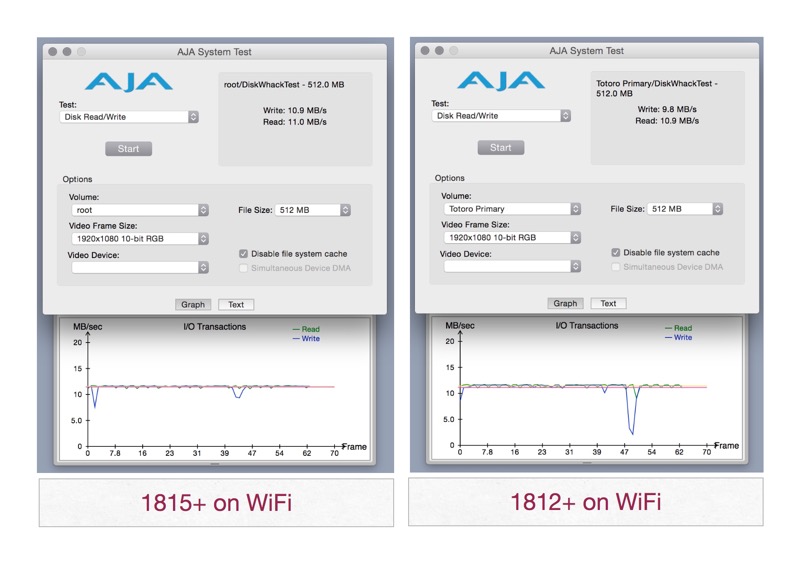
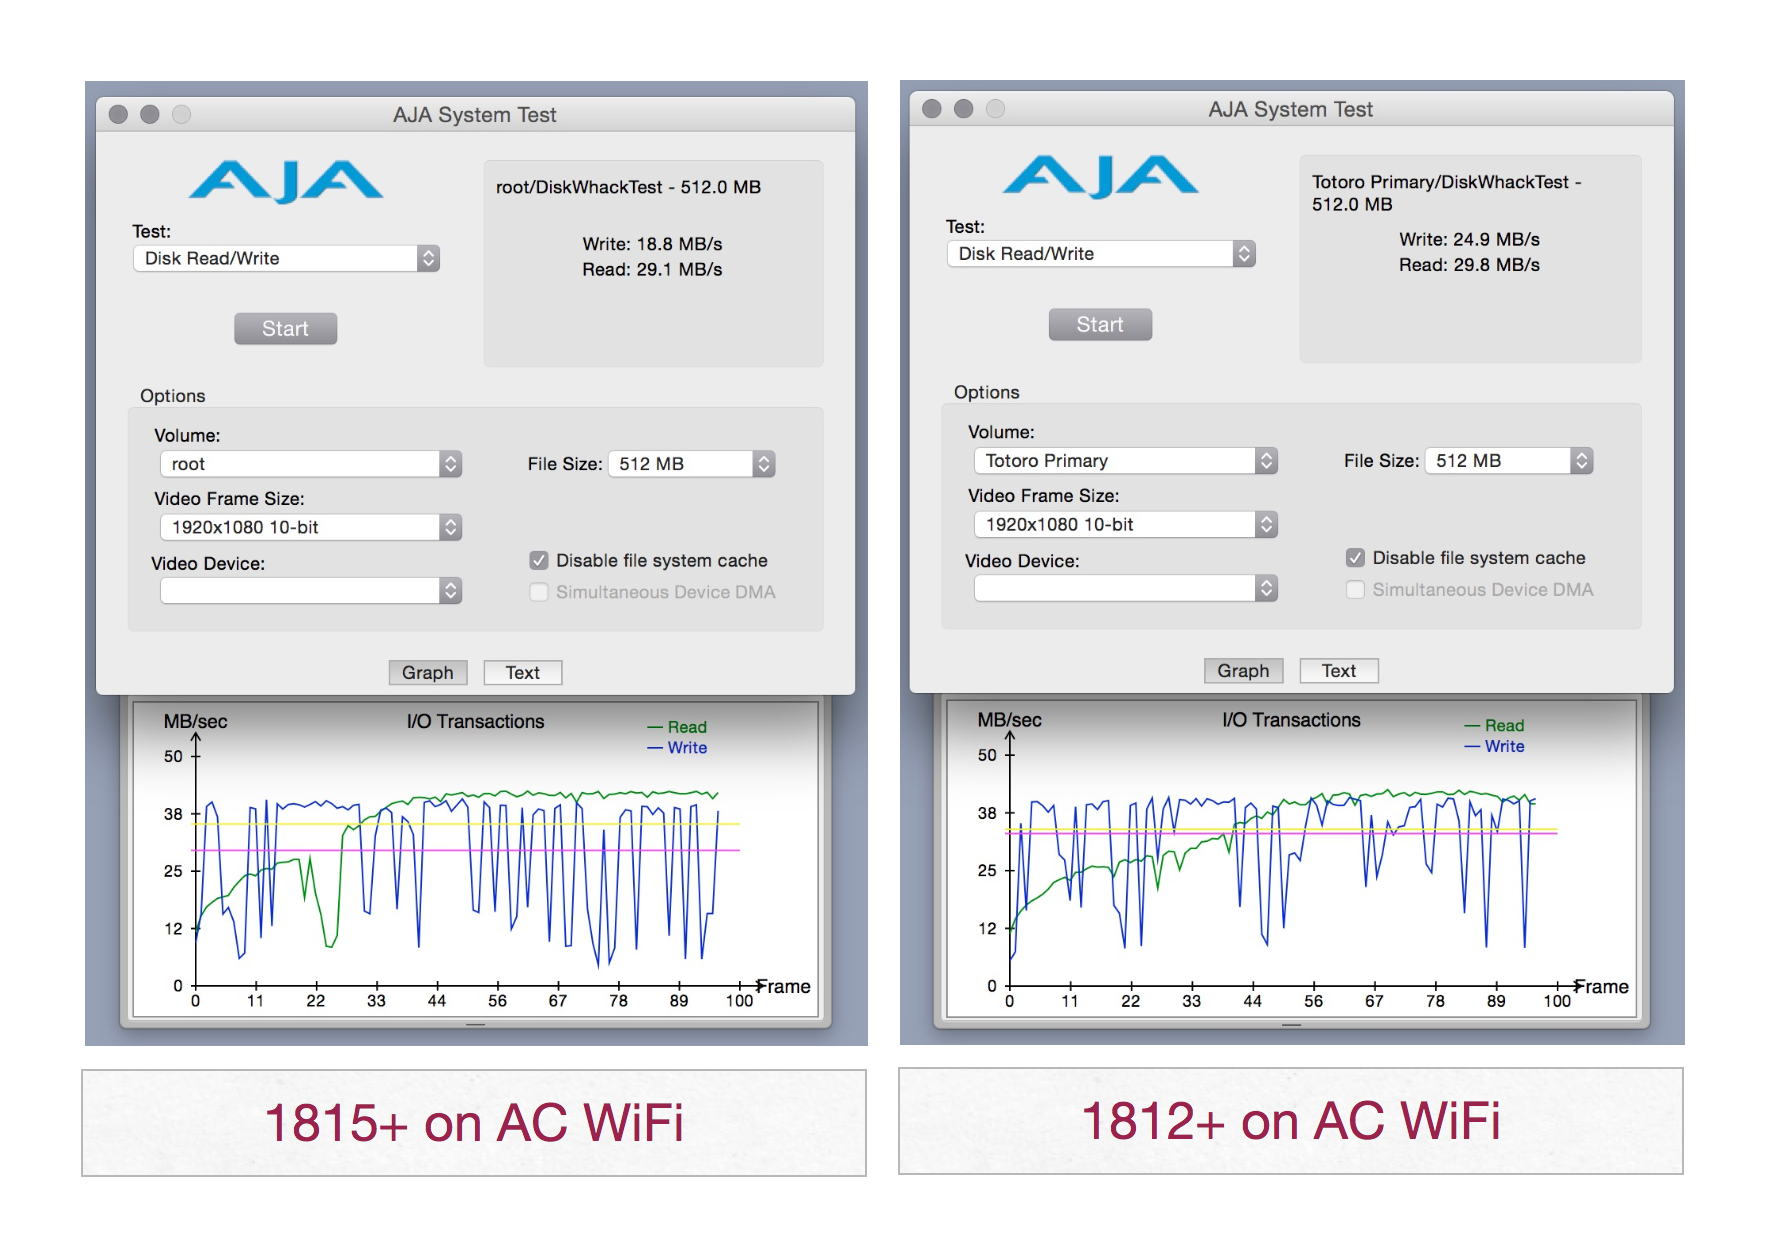
I feel a little bad about this, but I just can’t stomach meticulous data transfer testing. I’ve tried a bunch of tools and nothing gave me results that were consistent with each other. I felt a bit like deciding which liar was the most believable. Instead, I can tell you what I saw through the Finder and through the NAS self-reporting. I appear to be hitting the maximum throughput of Gigabit Ethernet. Just for giggles, here’s what the AJA testing tool shows me.
Both the 1812+ and 1815+ are top notch NAS options on WiFi.3 It should be noted that the 1815 unit was streaming a movie through Plex for my family during testing.4
On Ethernet, they’re even better.
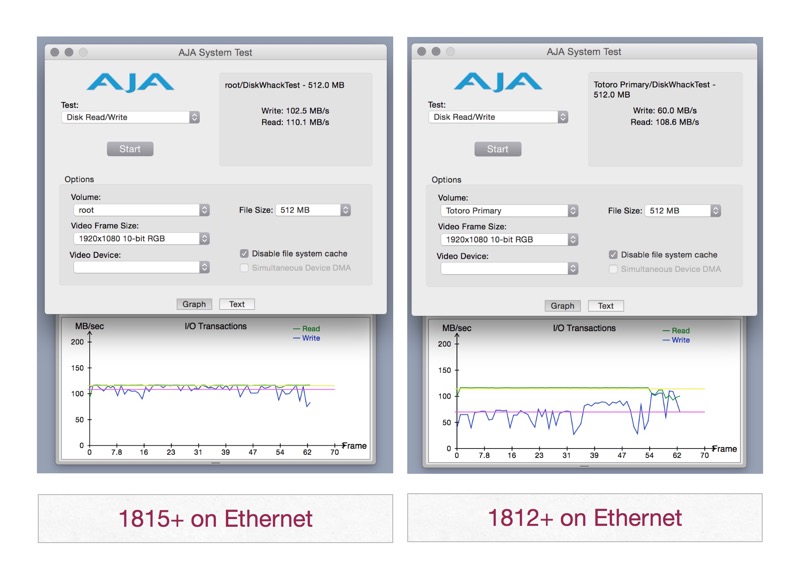
I’m skeptical of these types of tests as a way of predicting real world use. That said, it feels really fast for a NAS.
I’ve enabled the bonded Ethernet aggregation on both the 1812 and 1815. Of course, the nature of the network will also matter. Here’s what the Synology 1815+ reports as throughput when copying directly from the 1812+ over Ethernet.

That’s 98 MB/s which seems fast but not as fast as I would have predicted.
Plex Streaming
This is something that I get a lot of questions about. First, if you go with the 1815+, you’ll need to perform a custom install of Plex. Apparently, Synology and Plex are not playing well together and they both refuse to make a single change to a config file to make the Synology package work. Check-out this thread on the Plex forum for some hints at getting it running. It worked perfectly for me. I connected through the terminal to the Synology instead of using a Windows computer. It all worked easily enough but it’s not for tourists.
Once the single config line is changed and the Plex package is installed then it all runs well.
Before I get more questions or comments, the single most important thing to know about running a Plex server is that the client component and transcoding makes a huge difference in performance. For example, trying to stream MKV files to a Roku is a terrible idea. I encode everything to mp4 which works great with a Roku and pretty much everywhere else I need it to. Streaming 1080P video with multiple audio encoding formats requires no buffering.
Data Migration
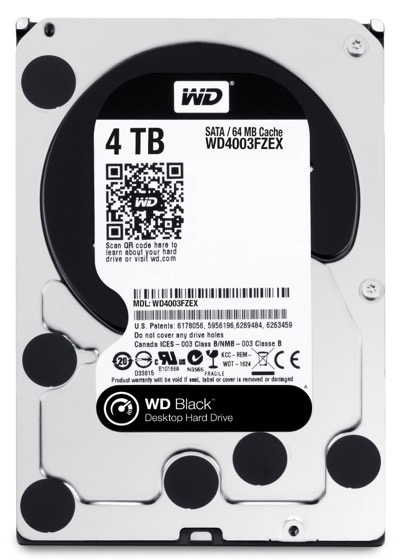
My biggest gripe about the Synology is that you can’t downsize the number of disks in use once volumes are created. If you add 7 disks you can’t back off to 6 disks, no matter how much free space there is. So, when I moved to the 1815, I decided to rebuild from scratch and use as few disks as possible. I switched to 4 TB Western Digital Black disks from the 2 TB Red disks where I could afford it.
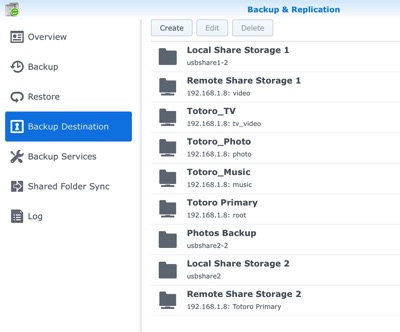
I used a couple methods for transferring data. One Synology can use another Synology as a backup target. I used this for most of my data except for photos. For my photo and home video collection I backed up to a standalone disk and then copied the files over through the Synology admin console. This gave me a backup along the way.
For my music collection, I took this opportunity to merge old iTunes folder structures into one single de-duplicated collection.
rsync File Merging
Unexpectedly, rsync was a great tool for merging directories. I started by creating a new empty music directory. Then I logged into the Synology from the terminal.5 Once there, I could start an rsync from each individual music collection into the new directory.
Because iTunes mostly kept my music collection organized by artist, I just needed to merge the various artist and album sub-directories.
The basic command looks like this: rsync source_dir target_dir. With a few rsync options, you can make sure only unique files are copied. Duplicates are ignored.
:::shell
rsync -vaEzPW /volume1/iTunes/iTunes/* /volume1/music/
There are a ton of rsync options. There’s also good suggestions all over the web.
-v is verbose reporting
-a is basically copies directories recursively with some extra magic
-E preserves the files executability
-z compresses files during transfer
-P picks up where it left off if rsync dies
-W transfers whole files
It was a bit tedious. When it was all done, I ended up with very few duplicate tracks. Where I did have duplicates, it was easy enough to clear them out. This is the first time in a decade that I’ve had a single unified music collection without multiple levels of “iTunes” folders buried somewhere within.
Backup
The Synology backup application works well enough but it’s pretty slow. Backing up 5 TB of data from one NAS to another can take days. It appears to just use rsync behind the scenes with an additional layer of monitoring. When it failed, I’d get a convenient notification on my phone. The backup wizard is pretty easy to use and there are a large number of options for creating unattended and scheduled backups.
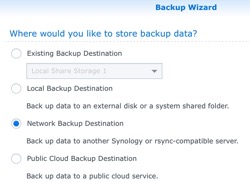
I’ve used the built-in backup system for Synology ever since I’ve used the NAS. I used it a heck of a lot more to move from the old NAS to the new NAS. I created several different backup jobs and then just let them run.
The only failures I had during the backup process involved Aperture libraries. For whatever reason a few thumbnail files failed to be read. I stopped using Aperture a year ago and long since exported and organized my files outside of a vault file. So I skipped the failed files.
Sneaker Net with External USB3 Drive
Using the backup application worked much better with a USB3 drive directly connected to the Synology. The entire backup took just a couple of hours. If you have more spare drives than spare time, this is the way I’d recommend.
Conclusion
The 1815+ is a modest upgrade from the 1812+ and 1813+. I’m happy with the results but that’s because I run a considerable number of processes on my NAS. The new CPU architecture means you may lose support for some packages you care about and Synology is not very transparent about that.
The unofficial Synology packages receive even less support than the official packages do for the new chipset.
If you just want a great high-end NAS, then the Synology 1815+ is terrific. If you want a Plex server then get your wits about you and understand how Plex works and what encoding is best. If you do that, the 1815+ is also terrific. If you own an 1813+ you’re probably already pretty happy with it. Enjoy that feeling.
If you want to buy an 1815+, here’s an affiliate link that enable my future reviews.
-
From my modest research, it looks like the Synology servers retain their value well. I might just sell the 1812+ in the near future. The spec sheet is available from Synology. ↩︎
-
The 1812+ runs a Dual Core 2.13GHz chip. The 1813+ is the same configuration. ↩︎
-
I’m on ac-band for most of my WiFi but this test was using 802.11n which has a theoretical limit of 75 MB/s. It feels pretty good. As expected, AC WiFi is better but no where near the theoretical maximum of 850 MB/s. As anything WiFi, other traffic can cause variable results. ↩︎
-
What kind of person interrupts Ponyo to test a computer? ↩︎
-
To SSH into the Synology, you’ll need to use the root@YOUR_IP_ADDRESS and provide the admin password. ↩︎