Moving from a Drobo to a Synology NAS
I’ve been using a Drobo connected a Mac Mini server for about 5 years. It’s performed well and I have not had a single complaint about the device. I’ve had at least six disk failures and the Drobo handled them like a champ.
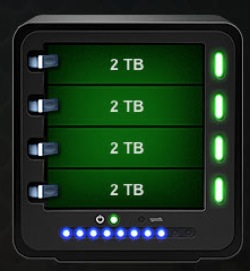
But things die and I like to be prepared. I expect this Drobo is not long for this world and I wanted to go with a standalone NAS device instead of a shared drive on a server. I began researching a replacement for the 4-bay Drobo about six months ago. I recently upgraded to a true NAS and this is my review.1
The Drive
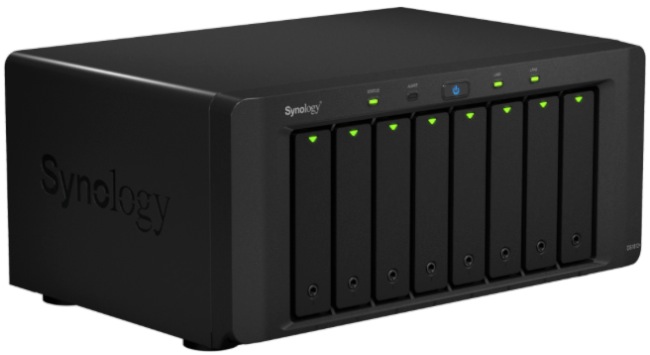
I purchased the mysteriously named Synology 1812+ drive through Amazon. It’s not cheap, at $1000 without any disks. The 1812+ is an 8-bay NAS server. If you’ve seen a Drobo, it looks similar, but not as nice. It resembles a small Linux box and pretty much is. The Synology Web site has all the information you may need on the drive and then some.
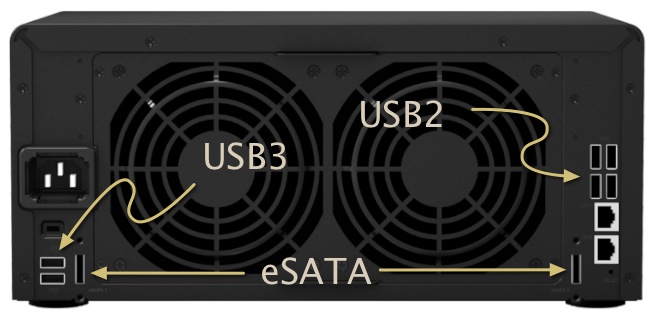
The 1812+ had the right complement of ports for my needs. There are a set of four USB 2.0 ports on one side and two USB 3.0 ports on the other. Considering that my plan was always to connect it directly to my network by way of an Ethernet cable, the other connections weren’t that important to me.
The Install
I installed the Synology Mac app and connected the NAS to my network. The app simply finds the NAS and then launches an admin webpage. That’s pretty much it for connecting. Most of the install time is spent inserting drives and formatting them. Unlike the Drobo, the disks must be mounted to a sled in order to insert them. The hardware is included.
The Synology takes care of all disk administration except automatically formatting disks and creating new volumes. Volume management is easy. One NAS can share multiple volumes. Directories can be added, moved or deleted from the admin interface or from the mounted volume.
The Disks
I previously used WD Green drives. They are cheap and run very cool. For this new setup I decided to go with 3TB disks. Several people on Twitter recommended the NAS grade version, WD Red disks. After some brief research, including Amazon reviews, I took the plunge and started stockpiling WD Red drives. For a comparison, the Red drives were about $150 for 3TB whereas the Green disks were $140. The Reds definitely have a good reputation so I don’t think the extra few bucks were a waste.
The Network
The Synology drive supports Link Aggregation as long as your network switch does as well. Aggregation allows the drive to increase transfer speeds by using two simultaneous network connections to transfer files to the same host. Synology provides two options to set this up. The first is for redundancy. If one network connection goes down, it will use the other. This also allows two clients to use different network ports on the Synology. I chose the second option, which essentially splits the load across the two ports, even from the same client.
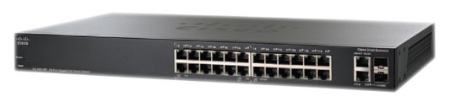
I’m using a Cisco SG200-26 24 network switch ($270 from Amazon). I upgraded from an SMC switch a while ago because I was starting to suspect it was causing some networking issues. The Cisco switch has been fantastic. Better yet, it supports Link Aggregation to match the Synology drive setup. I noticed about a 40% improvement in file transfer speeds. That improvement was more significant when transfering directories with many smaller files.
The Setup
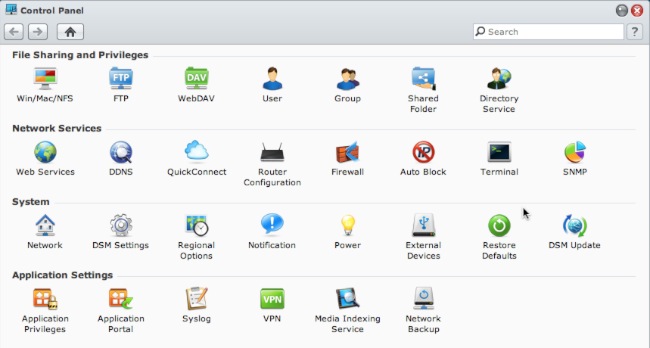
The administration panel for the Synology is significantly more advanced than a Drobo. Since a Synology drive is more than just a drive, there are tools for administering the various server features, such as the FTP server, Mail server and Apache server.
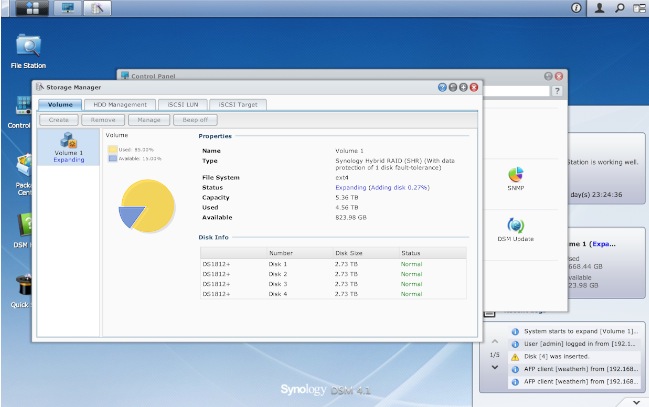
The real meat is the disk administration and Synology keeps it pretty simple. A started off with 3 x 3TB disks but decided to add a fourth. The process requires one manual step after inserting a new drive. I was required to select the new drive and add it to my disk group. Expanding to the fourth drive required about 36 hours.
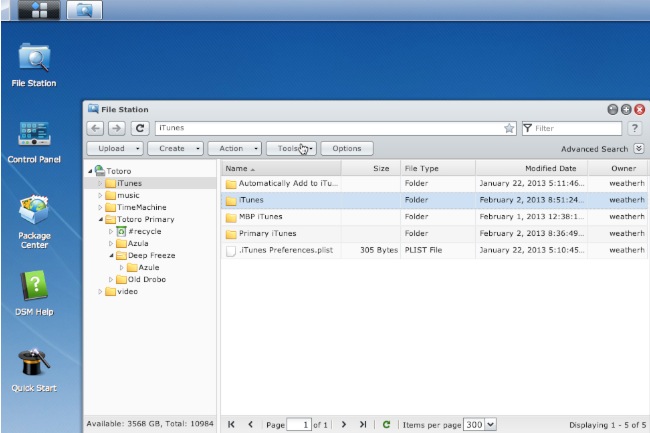
I’m not using most of the advanced server features of the Synology drive yet. My primary use is for backups and storage. To accomplish this, I created several logical disks.
- The main deep freeze where I store just about everything
- A Time Machine disk
- An iTunes disk
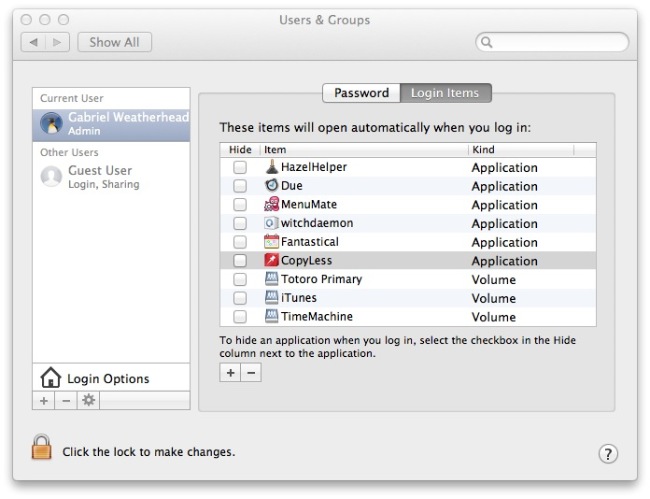
Each disk is mounted through the server. Here’s a little trick to make sure they are always available when I need them: Drag the disks to the startup items under the user preferences. That way, if I reboot, the disks are remounted for me.
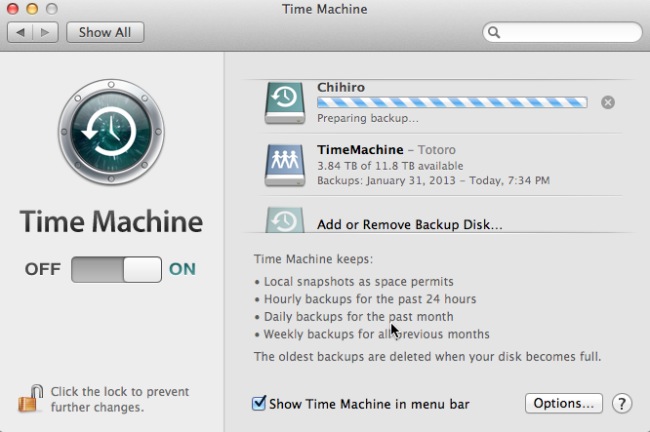
I don’t use the Synology as my only Time Machine backup. There’s a FireWire disk directly attached to my computer when I’m at my desk. That offers much faster performance if I want to recover a file. However, by keeping a secondary Time Machine vault on the Synology, if my FireWire disk dies I’ll still have access to my entire Time Machine collection.
To add a second Time Machine disk, just go to the preferences and add another. Time Machine will decide when to use each.
 Synology has just started advertising the next update to their management software and it looks very nice. Apparently they intend their drives to serve as fully realized media hubs for mobile devices. I’m curious to see what they can do, but not curious enough to use beta software for my primary backup.
The Performance
This is the speed test from a USB 3.0 Seagate drive directly connected to my rMBP:
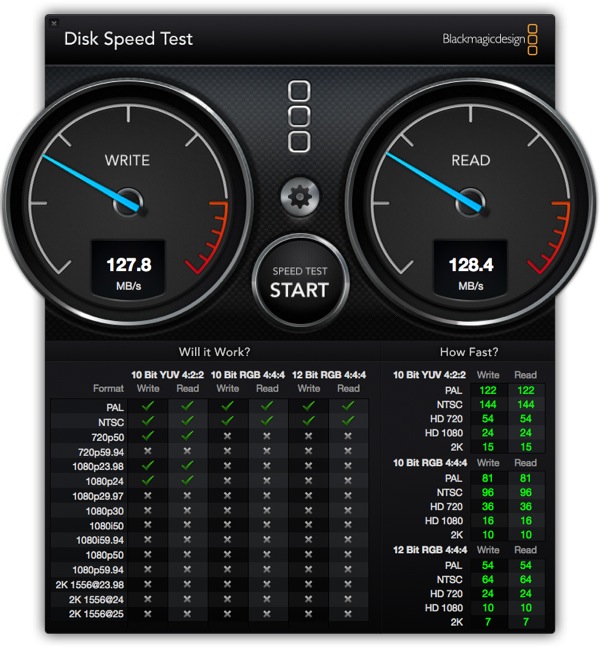
This is the Synology drive connected over Ethernet through my router:
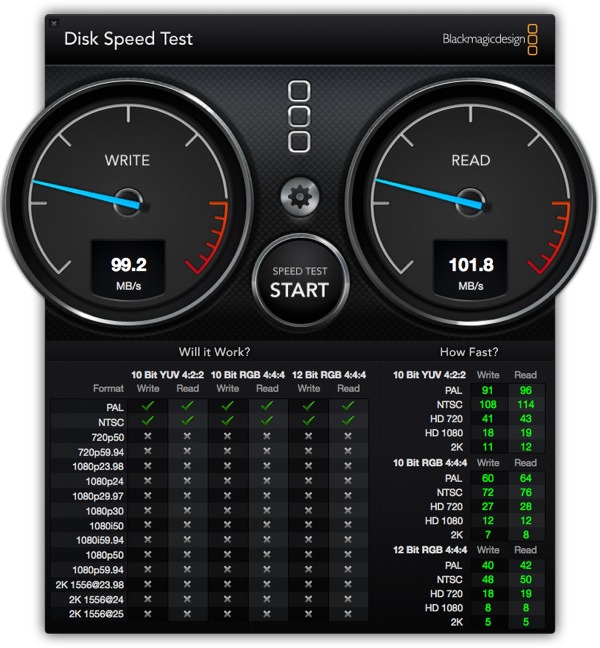
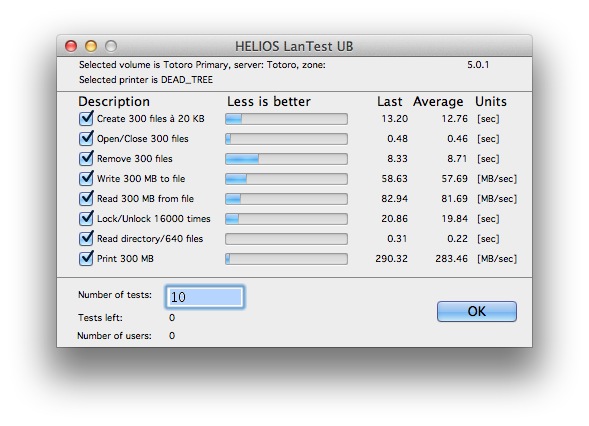
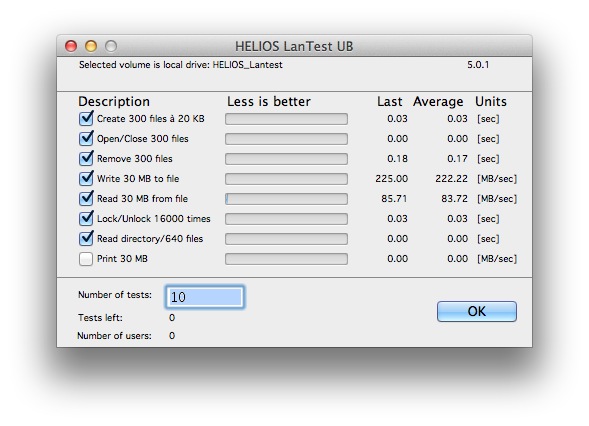
Those numbers look impressive. A bit too impressive for my taste. Next, I used the Helios LanTest application. It’s ugly but utilitarian. These numbers more closely match what I see through the console while copying large files.
This is the Synology
For a comparison, here’s the performance of a directly connected Seagate drive over USB 3.0
This is my Drobo shared through a Mac Mini:

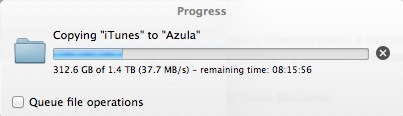
But the proof is in the real-world use. Here’s what it looks like to transfer my iTunes media folder from the USB 3.0 Seagate drive to the Synology drive on my network:
The Extras
The Synology is a sophisticated little robot. It’s not just a RAID box filled with disks. It’s a standalone server.
There are many options in the administrative web interface for the Synology. Many features are installed on demand through an app-store like interface. I really like this option. It’s easy and keeps the system lean if I don’t want all of the extras.
The options for this NAS are many and varied. The most basic features allow the Synology to become a standalone FTP server, mail server, webDAV or webserver. The Synology is a server that happens to also automatically manage an array of disks.
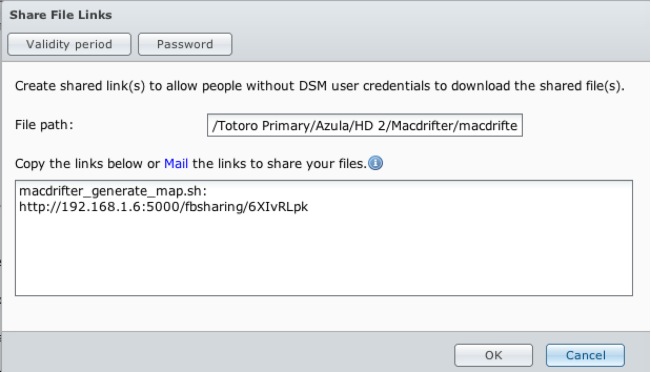
But there are some really advanced features that I plan to use but just have not had the time. My favorite might be the private Dropbox-esque file sharing. Once the NAS is configured with a static IP addressed with Internet access, I can generate public links to files and share them. They can be set to expire or given a password. That sounds pretty useful.
The 1812+ also includes support for iTunes sharing. In theory, it creates a new shared iTunes library that shows up in iTunes as a network library. There’s a separate shared iTunes library for music and video, which I’m not a fan of. iTunes management just feels more awkward using this setup, especially for someone that tweaks meta data a lot.
Conclusion
The Synology is a huge improvement over a Drobo connected directly to a Mac server on the network. Performance and overall connectivity is much better. I really like all of the options for file management and the system is easy to administer. I think the Synology is a great alternative to a Drobo, even for someone that loves Drobo.
-
Affiliate links show up throughout this review. ↩︎